How To Boil Shrimp
On Mar 11, 2025

Boiling your own shrimp at home is a simple way to enjoy plump, sweet, and tender seafood. This quick process yields fresher and tastier results than store-bought steamed shrimp, often at a lower cost.
Homemade boiled shrimp are perfect for cocktail sauce, peel-and-eat dishes, salads, and sandwiches. The key to success is avoiding overcooking, which can make shrimp tough. Let's learn how to boil shrimp right in your own kitchen, ensuring delicious results every time.
Ingredients To Boil Shrimp
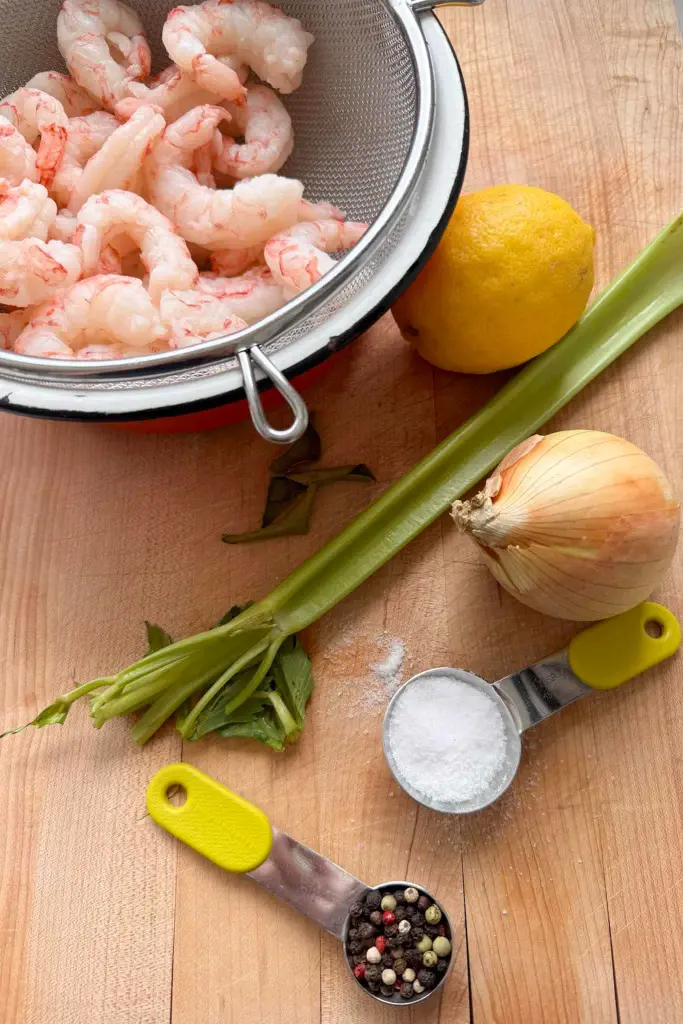
Onion
Yellow or white onions are preferred for their balance of sweetness and pungency. As they cook, they release natural sugars and aromatic compounds that infuse the water and shrimp with a complex, savory-sweet flavor. The onion also helps to soften the briny taste of seafood, making the shrimp more palatable.
Lemon
The citrus fruit plays multiple roles in this recipe. Its acidity helps break down the proteins in the shrimp, resulting in a more tender texture. The lemon's bright, zesty flavor cuts through the richness of the seafood and adds a fresh, summery note to the dish. You can use both the juice and zest for maximum impact.
Celery
Often underestimated, celery adds depth to the flavor profile. Its subtle, earthy taste and slight bitterness balance the sweetness of the onion and the richness of the shrimp. Celery also contains natural sodium, which enhances the overall savoriness of the dish without adding extra salt.
Bay Leaves
These aromatic leaves impart a subtle, complex flavor that's hard to describe but unmistakable when present. They add a slightly floral, tea-like quality to the broth.
While some believe bay leaves aid digestion, their primary role here is flavor enhancement. Remember to remove them before serving, as they're not pleasant to eat whole.
Peppercorns and Sea Salt
Use whole, fresh peppercorns to add a gentle spiciness to the dish. They provide a warm, slightly sharp flavor that doesn't overpower the other ingredients. And a small amount of sea salt is crucial.
It enhances the flavors of all the other ingredients and helps tenderize the shrimp. Be careful not to add too much, as the goal is to complement, not overpower, the natural taste of the shrimp.
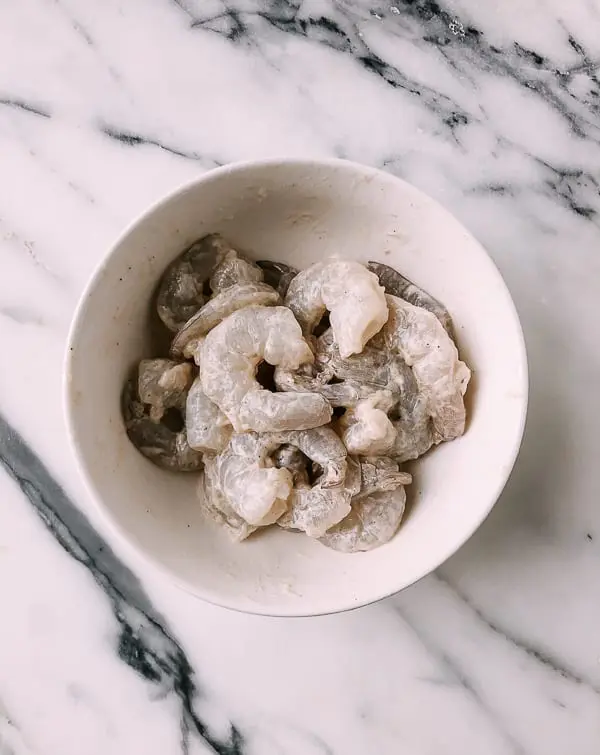
Shrimp
This recipe calls for 1-2 pounds of large shrimp. They can be either frozen or fresh, but should be deveined for the best texture and appearance. The size of the shrimp affects cooking time, so adjust accordingly.
Equipment Required To Boil Shrimp
1. Large Stockpot
A large stockpot is the cornerstone of your shrimp boil setup. For home use, a pot ranging from 12 to 20 quarts is typically sufficient, with 16 quarts being an ideal size for most families.
Stainless steel is the preferred material due to its durability and even heat distribution, though aluminum is a lighter and more affordable alternative. Look for a pot with sturdy handles to ensure safe maneuvering when full, and a thick bottom to prevent scorching.
2. Kitchen Stove
While gas stoves offer more precise heat control, electric stoves are equally capable of handling the task. The key is to have at least one large burner that can accommodate your stockpot. The stove should have sufficient heat output to bring a large pot of water to a rolling boil and maintain it throughout the cooking process.
3. Colander or Strainer
A large colander or strainer is essential for draining your shrimp boil safely and efficiently. It should be sizeable enough to hold all the ingredients from your pot without overflow.
Stainless steel is an excellent choice for its durability and heat resistance, though a heavy-duty plastic version can also work if it can withstand high temperatures. Look for a footed design, which allows water to drain freely, and handles for easy maneuvering when full.
4. Slotted Spoon or Tongs
Long-handled utensils are vital for safely handling hot ingredients. A slotted spoon or a pair of tongs with handles 12-16 inches long will keep your hands at a safe distance from steam and hot water.
Opt for heat-resistant materials like stainless steel or silicone-coated options. A slotted spoon with large slots allows water to drain while securely holding food. For tongs, a spring-loaded design with a locking mechanism offers ease of use and convenient storage.
5. Large Serving Bowl or Platter
The final presentation of your shrimp boil deserves a suitably large serving vessel. Choose a bowl or platter large enough to comfortably hold all your cooked ingredients without crowding.
Materials like ceramic, melamine, or stainless steel work well, but avoid those that retain heat excessively. A wide, shallow bowl or a platter with a slight rim helps contain the flavorful juices.
How To Boil Shrimp
Ingredients
- ½ lb large shrimp, peeled and deveined
- 1 lemon, halved
- pinch of sea salt and black pepper
- 1-2 bay leaves
- 8 cups filtered water
- One onion
- Celery
Instructions
Step-1: Prepare the Boiling Liquid
- Begin by filling a large pot with water. The amount of water should be sufficient to fully submerge all the ingredients you plan to add.
- To this water, add aromatic ingredients that will infuse the liquid with flavor. These include chopped onions, which provide a sweet and savory base; lemon halves or quarters, which add a bright, citrusy note; celery stalks, contributing an earthy undertone; a few bay leaves for their subtle, herbal essence; and whole peppercorns for a gentle heat. These ingredients will create a flavorful broth that will season the shrimp as they cook.
Step-2: Bring to a Boil and Season
- Place the pot on high heat and bring the liquid to a rolling boil. This vigorous boiling is crucial as it helps to extract maximum flavor from the aromatics and ensures that the shrimp will cook quickly and evenly.
- Once the water is boiling, add salt to taste. The amount of salt can vary based on personal preference, but remember that the goal is to enhance the natural flavors of the shrimp and aromatics, not overpower them.
- Stir the liquid to ensure the salt dissolves completely.
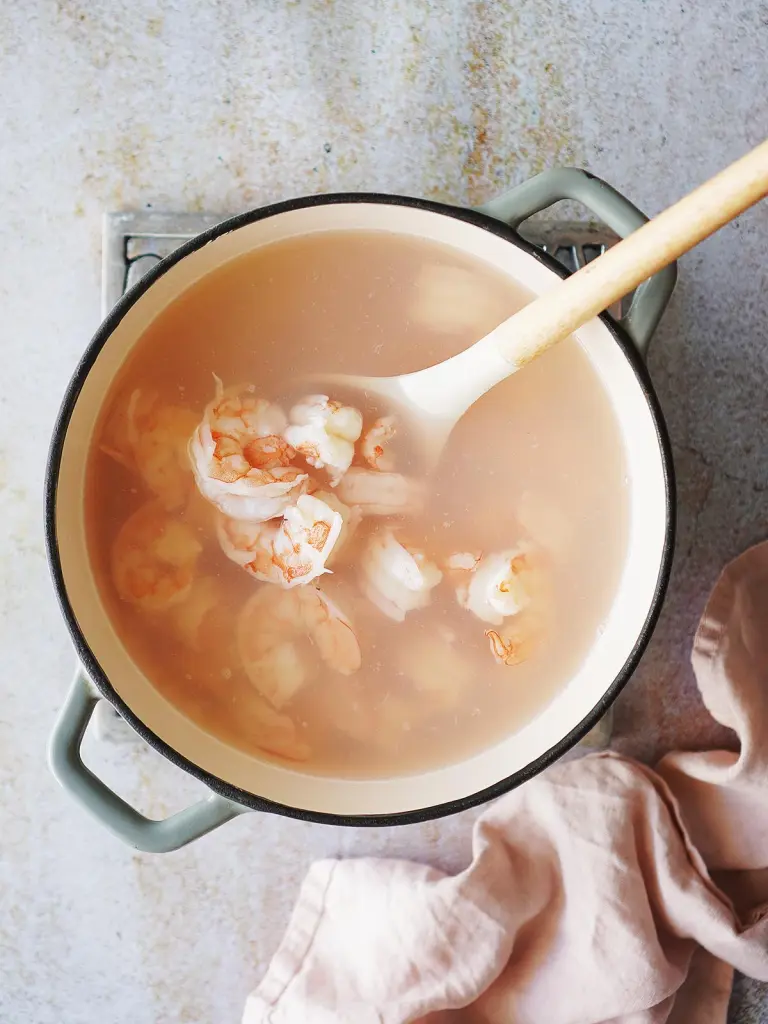
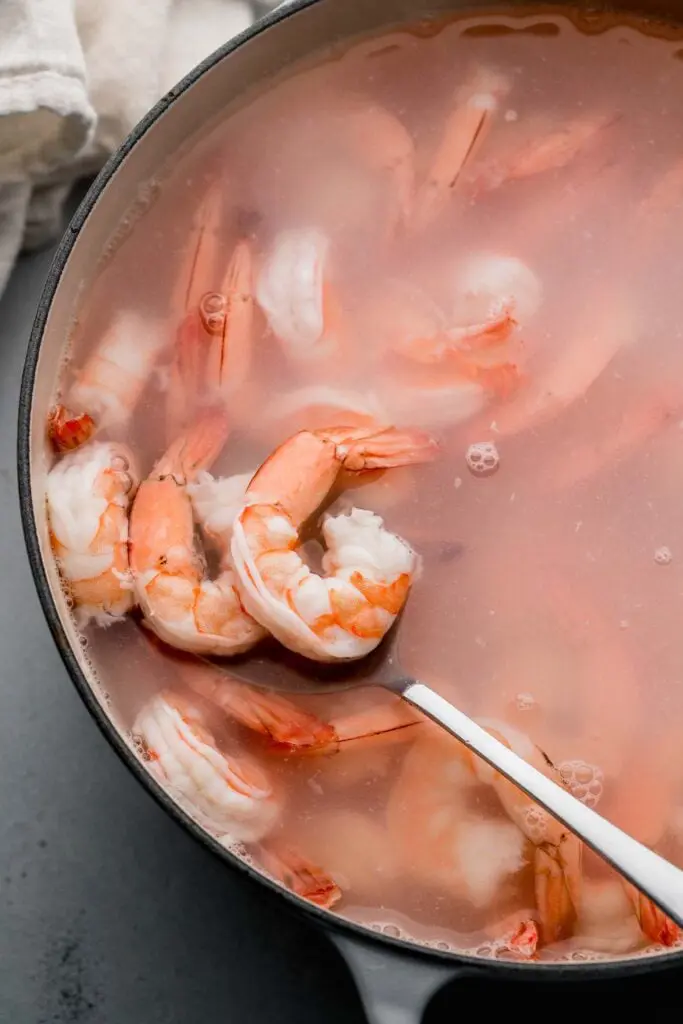
Step-3: Cook the Shrimp
- With the seasoned liquid at a full boil, it's time to add the shrimp. Gently lower the shrimp into the boiling water. The cooking time is brief but crucial – approximately 2 minutes is often sufficient for medium to large shrimp.
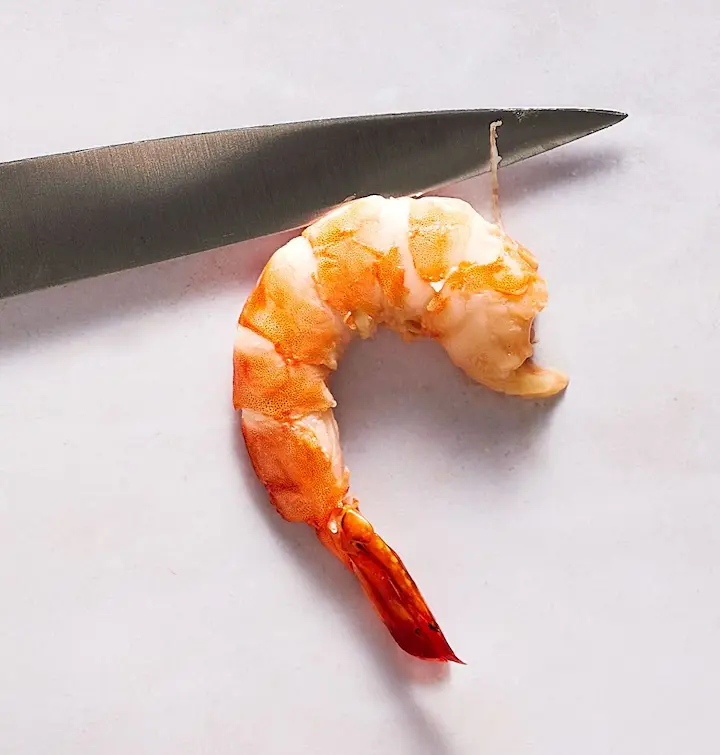
- Watch the shrimp closely as they cook. You'll know they're done when they turn opaque and pink, and either float to the surface or curl into a distinct 'C' shape. It's important to be vigilant at this stage, as overcooking can quickly lead to tough, rubbery shrimp.
- The goal is to achieve tender, succulent shrimp with a perfect texture.
Step-4: Cool the Shrimp
- Once the shrimp are cooked, it's essential to stop the cooking process immediately to prevent overcooking.
- Using a slotted spoon, quickly remove the shrimp from the boiling water.
- Transfer them immediately to a prepared ice bath or a bowl filled with ice water. This rapid cooling not only stops the cooking process but also helps preserve the shrimp's tender texture.
- The ice bath also makes the shrimp easier to handle for peeling, if necessary.
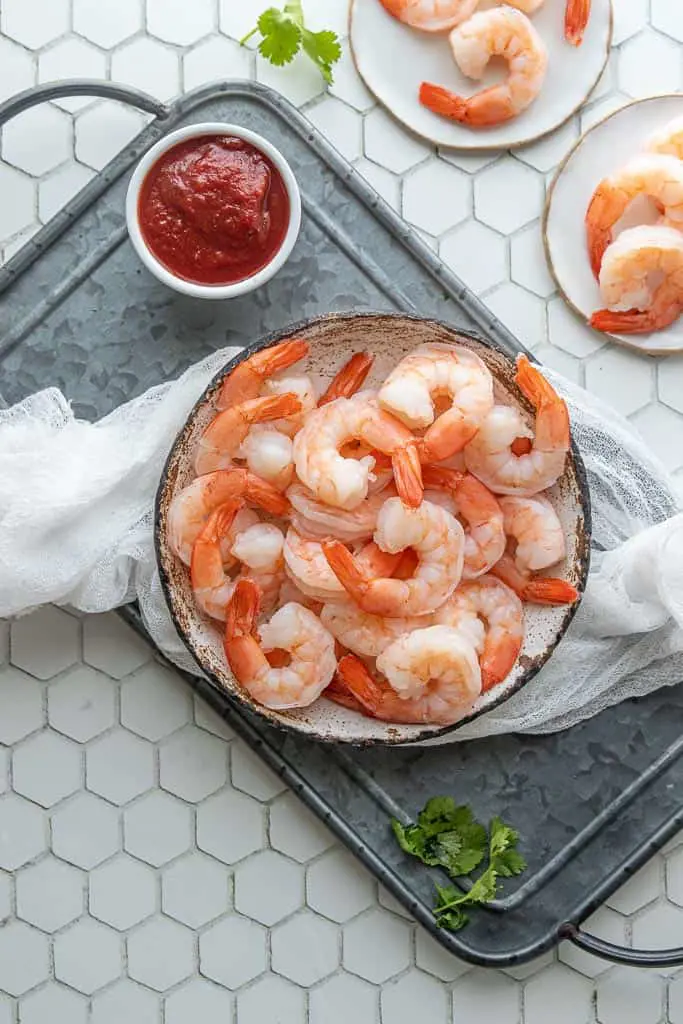
Step-5: Final Preparation
- After the shrimp have cooled in the ice bath, you can remove them and pat them dry with paper towels.
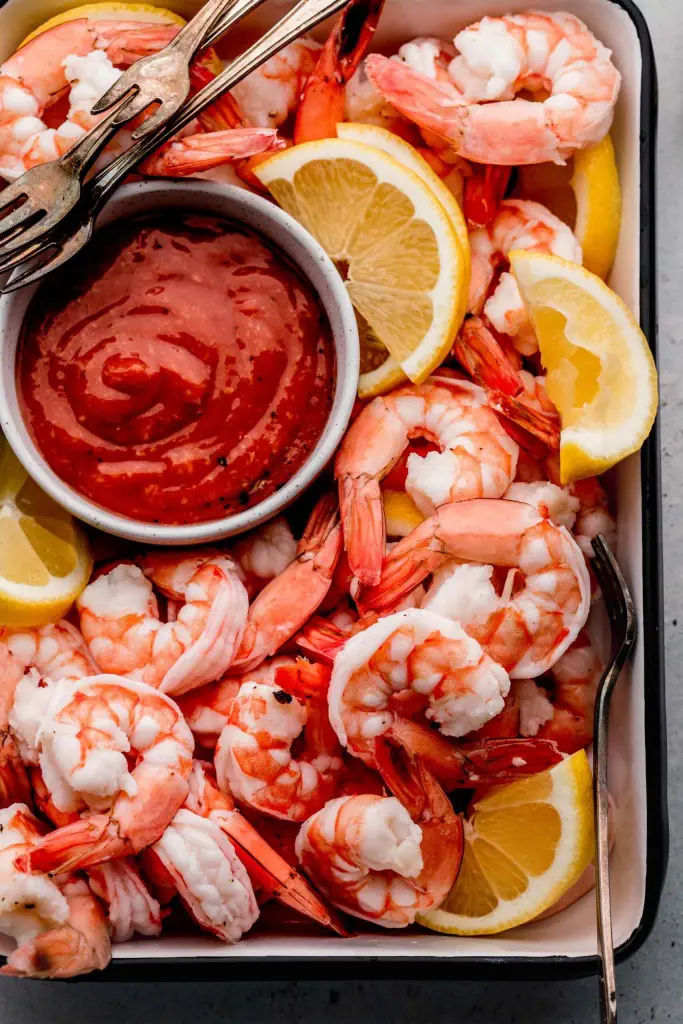
- If your recipe calls for peeled shrimp, you can remove the shells at this point. The cooked and cooled shrimp are now ready to be used in your chosen recipe, whether that's a classic shrimp cocktail, a refreshing salad, or any other dish.
- If you're serving them as is, consider arranging them on a platter with lemon wedges and a dipping sauce of your choice.
How Long To Boil Shrimp
The cooking duration for shrimp is typically brief, usually around 2 minutes. However, this can vary depending on the shrimp's size. It's crucial not to exceed 5 minutes of cooking time, as this risks making the shrimp rubbery and tough.
Shrimp cook quickly due to their small size, regardless of the cooking method. For this particular recipe, the process is straightforward: add the shrimp to boiling water, then immediately turn off the heat. Allow the shrimp to cook in the hot water for 10 minutes, using the residual heat to complete the cooking process.
Unlike many other shrimp recipes, this method requires an additional step of chilling the shrimp before serving. It's important to factor this cooling time into your meal preparation schedule to ensure the shrimp are properly chilled when it's time to serve.
How Do I Check The Doneness
After the shrimp have been in the hot water for 10 minutes, it's time to check if they're fully cooked. Look for these key indicators of doneness:
Color and Opacity: Properly cooked shrimp will have turned from their raw grayish color to an opaque pinkish-white. The flesh should be completely opaque throughout, with no translucent or grayish areas remaining.
Shape: As shrimp cook, they naturally curl into a C-shape. This curl is a good visual indicator of doneness. If the shrimp have formed a tight C or O shape, they may be slightly overcooked.
Texture: Gently press a shrimp with your finger. It should feel slightly firm with a bit of spring to it. If it's too soft or mushy, it needs more time. If it's very firm or rubbery, it may be overcooked.
Can You Boil Frozen Shrimp
Yes, you can indeed boil frozen shrimp. However, there's an important step to keep in mind for the best results on how long.do you boil shrimp if its frozen:
Defrosting: While it's technically possible to cook shrimp directly from frozen, it's strongly recommended to defrost them first. The preferred method is to thaw the shrimp overnight in the refrigerator. This slow thawing process helps preserve the texture and flavor of the shrimp.
Defrosted shrimp cook more evenly than frozen ones. When you boil frozen shrimp, the outer layer may overcook before the center is fully thawed and cooked.
How to thaw shrimp
There are two effective methods for thawing frozen shrimp, each suitable for different time constraints:
1. Overnight Method:
This is considered the best approach for thawing shrimp. Begin by transferring the frozen shrimp to a colander. Place the colander over a bowl to catch any water that drips as the shrimp thaw.
Cover the shrimp with a damp paper towel or dish towel to maintain moisture. Then, place the entire setup in the refrigerator and leave it overnight. This slow thawing process helps preserve the texture and flavor of the shrimp while ensuring food safety.
2. Quick Cold Water Method:
If you're short on time, you can use this faster method. Start by placing the frozen shrimp in a tightly sealed plastic bag, ensuring there are no leaks. Submerge the sealed bag in a bowl of cold water.
The shrimp will typically thaw within 15 to 20 minutes using this method. This approach is quicker than the overnight method but still safe, as the cold water prevents the shrimp from entering the temperature danger zone where bacteria can multiply rapidly.
Tips For Adding Flavors To Boiled Shrimp
Boiled shrimp can be a delicious and healthy meal, but without proper seasoning, it risks being bland and uninspiring. The key to elevating this simple dish lies in infusing it with layers of flavor at every stage of the cooking process.
From the moment you prepare the cooking liquid to the final garnish before serving, there are numerous opportunities to enhance the taste of your shrimp. Here's how you can transform basic boiled shrimp into a mouthwatering delicacy that bursts with flavor in every bite.
1. Flavorful cooking liquid:
- Bay leaves add a subtle earthiness
- Whole peppercorns provide a gentle heat that infuses the shrimp
- Crushed garlic cloves release their aromatic oils into the water
- Lemon slices contribute a bright, citrusy note
- Beer (especially light lagers) can add depth and slight maltiness
- White wine brings acidity and complexity
- Seafood stock intensifies the ocean flavor
2. Seasoning the water:
- Salt is crucial - use about 1/4 cup per quart of water
- Old Bay is a classic mix containing celery salt, paprika, red pepper, and other spices
- Cajun spice adds heat and robust flavor with ingredients like paprika, garlic powder, oregano, and cayenne
- Fresh herbs can be tied into a bouquet garni for easy removal
3. Infusing flavors during cooking:
- Onions, celery, and bell peppers (known as the "holy trinity" in Cajun cooking) add depth
- Citrus peels (lemon, lime, or orange) infuse oils without adding bitterness from the pith
- Consider adding corn cobs or small potatoes to create a full shrimp boil
4. Post-cooking marination:
- Use high-quality extra virgin olive oil for the best flavor
- Fresh lemon juice brightens the flavors; add zest for extra intensity
- Minced garlic and finely chopped herbs like parsley or cilantro add freshness
- Let the shrimp cool slightly before marinating to prevent overcooking
5. Dipping sauces:
- Classic cocktail sauce: ketchup, horseradish, lemon juice, and Worcestershire sauce
- Remoulade: mayonnaise-based with mustard, capers, herbs, and spices
- Garlic butter: melted butter infused with minced garlic and parsley
- Aioli: garlic-flavored mayonnaise, often with additional herbs or spices
- Tartar sauce: mayonnaise with chopped pickles, capers, and herbs
6. Finishing touches:
- Fresh herbs like dill, chives, or tarragon can be sprinkled on just before serving
- Lemon zest adds brightness without additional liquid
- Smoked paprika contributes a subtle smokiness and appealing color
- A light dusting of high-quality sea salt can enhance all flavors
7. Quick sauté:
- After boiling, pat the shrimp dry to prevent splattering
- Use a large skillet over medium-high heat
- Sauté for just 1-2 minutes to avoid overcooking
- Try flavored butters (like garlic-herb or chili-lime) for extra impact
How To Store Shrimp
Raw shrimp requires careful storage to maintain freshness and safety. Place raw shrimp in the coldest part of your refrigerator, typically the bottom shelves. If the shrimp are in a plastic bag, keep the bag open to allow air circulation.
Set the bag over a bowl of ice to keep the shrimp extra cold. Cover the top with a damp paper towel or dish towel to prevent the shrimp from drying out while allowing them to breathe. To extend the shelf life of raw shrimp that hasn't been previously frozen, you can freeze them.
Arrange the shrimp in a single layer on a baking sheet lined with parchment or wax paper. Place the sheet in the freezer until the shrimp are completely frozen. Once solid, transfer the shrimp to an airtight container or freezer bag. Properly stored frozen shrimp can last up to 3 months in the freezer.
How to Store Cooked Shrimp
Cooked shrimp should be refrigerated promptly, ideally within 2 hours of cooking to ensure food safety. The best storage method is to place the cooked shrimp in an airtight container.
Store this container in the coldest part of your refrigerator, which is usually on the bottom shelves. This storage method helps maintain the shrimp's quality and prevents them from absorbing odors from other foods in the refrigerator.
Ways To Use Boiled Shrimp
Boiling shrimps can be versatile ingredients in various dishes. Here are a few delicious options:
1. Shrimp Avocado Salad with Watermelon

This refreshing dish combines the sweetness of watermelon with the creamy texture of avocado and the savory flavor of shrimp. It's a naturally protein-rich and gluten-free option, perfect for a light summer meal.
The contrast of flavors and textures makes this salad both satisfying and refreshing. The coolness of the watermelon complements the shrimp beautifully, while the avocado adds a creamy element that ties the dish together.
2. Shrimp Pasta with Creamy Curry Sauce
This dish pairs the classic combination of shrimp and pasta with an unexpected twist - a creamy curry sauce. The result is an exotic and flavorful meal that's sure to impress.
The curry sauce adds depth and complexity to the dish, while the shrimp provide a delicate seafood flavor. This fusion of Italian and Indian-inspired cuisines creates a unique and satisfying meal that's both comforting and exciting.
3. Egg-White Wraps
Egg-white wraps offer a low-carb, high-protein base for a variety of fillings, including boiled shrimp. The beauty of wraps is their versatility - you can customize the fillings to your liking.
Boiled shrimp can be combined with fresh vegetables, herbs, and a light dressing for a healthy and satisfying meal. This option is great for those looking for a quick, nutritious lunch or a light dinner.
Recent posts
Kitchen Tips

Kitchen Tips
Sardines vs Anchovies: What Sets These Pungent Fish Apart?
Sardines and anchovies are both types of small, oily fish that are widely used in food around the world. Both sardines and anchovies are marine or saltwater fish. They are commonly found in coastal waters and are part of the vast array of species tha...
Kitchen Tips
14 Heavy Cream Substitutes For Cooking
Heavy cream, also known as heavy whipping cream, is a luxurious dairy product celebrated for its rich and velvety texture. The cream is made by skimming the fat content from fresh cow's milk with about 36-40% milk fat. However, there are severa...
Kitchen Tips
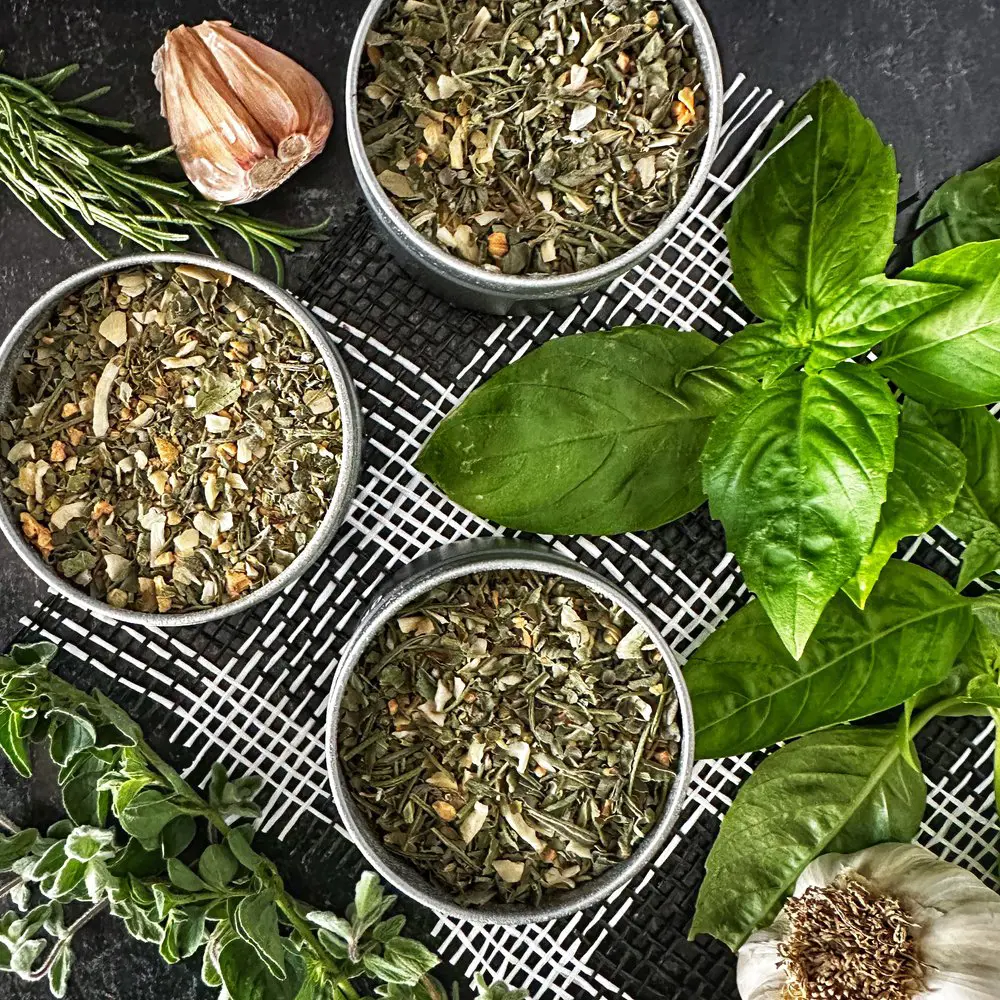
20 Best Italian Herbs And Seasoning Spices
Italian cuisine is known for its simplicity and the use of locally produced, high-quality, fresh ingredients. One of the reasons behind this is the skillful use of herbs and spices to enhance flavors and create diverse taste profiles. Depending on wh...
Kitchen Tips
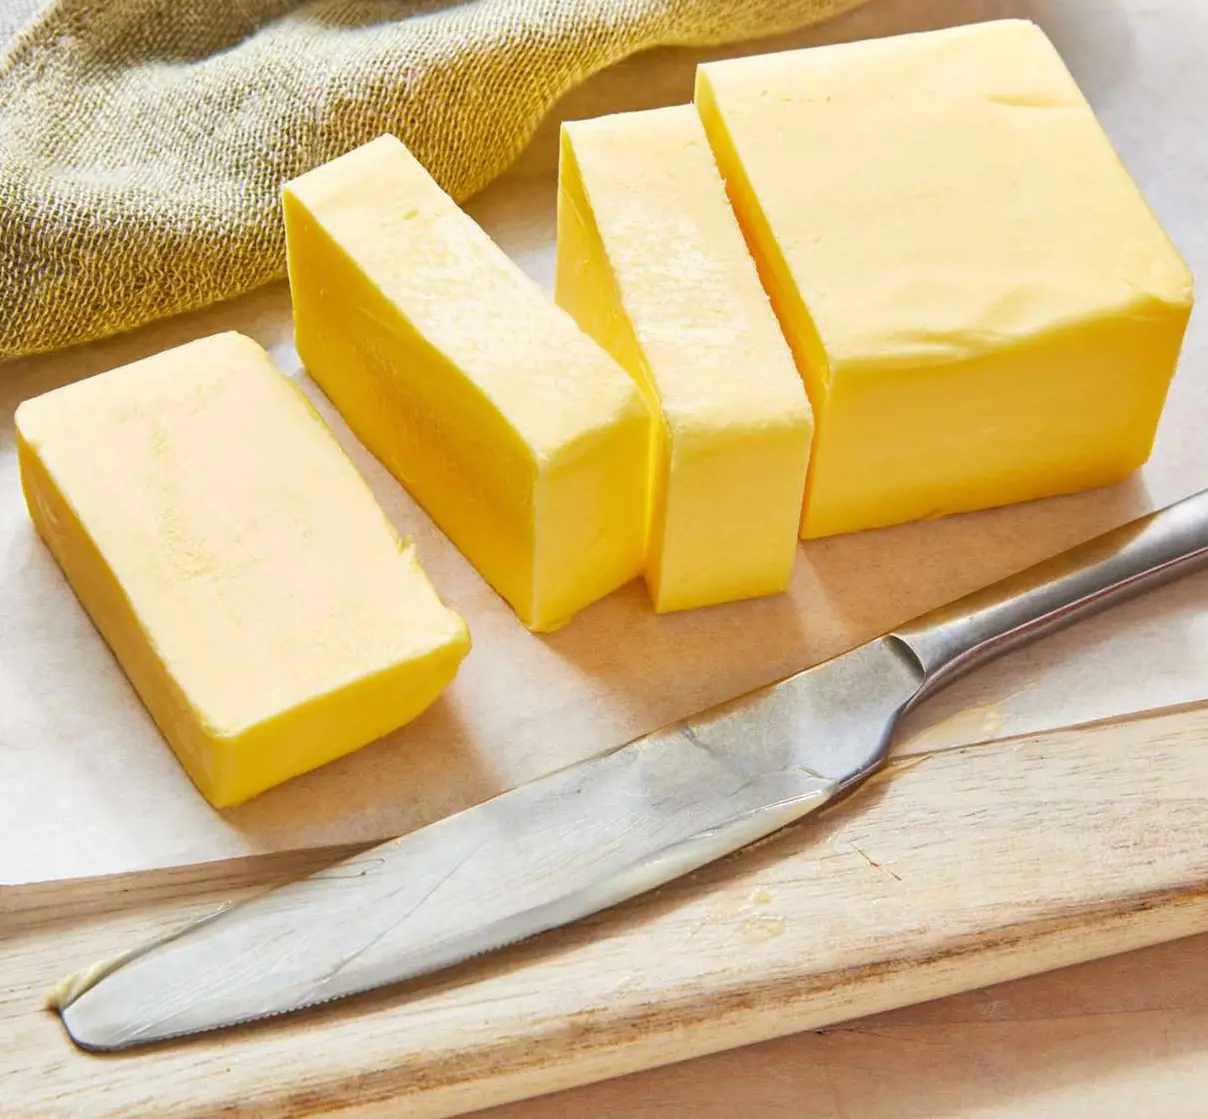
15 Butter Replacement Products When You Run Out Of It
Butter makes everything better. It is a kitchen staple that can be found in pretty much everyone's pantry. From baking to sauteeing, we use this ingredient in the kitchen pretty much every day. So, it is natural for us to look for alternatives for da...
Kitchen Tips
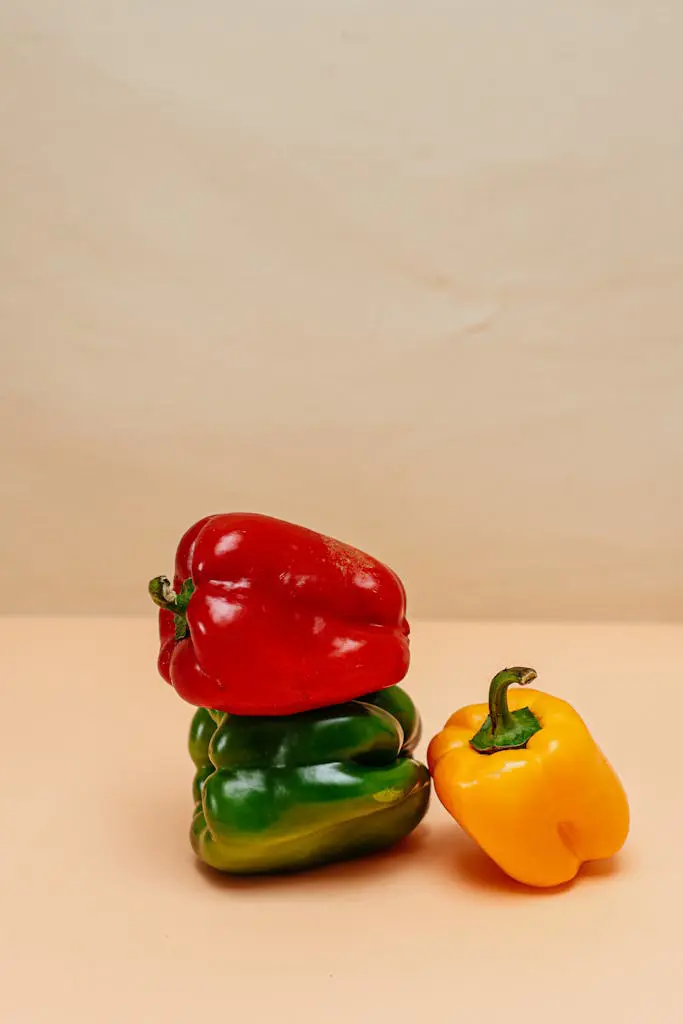
How Do You Freeze Bell Peppers
We’ve all had that moment of going to the store, purchasing too many bell peppers just to use for a recipe. Once your vivid veggies are peeled and placed in the fridge, they’ll last a few days, but they can spoil fast. Fortunately, you ca...
Kitchen Tips
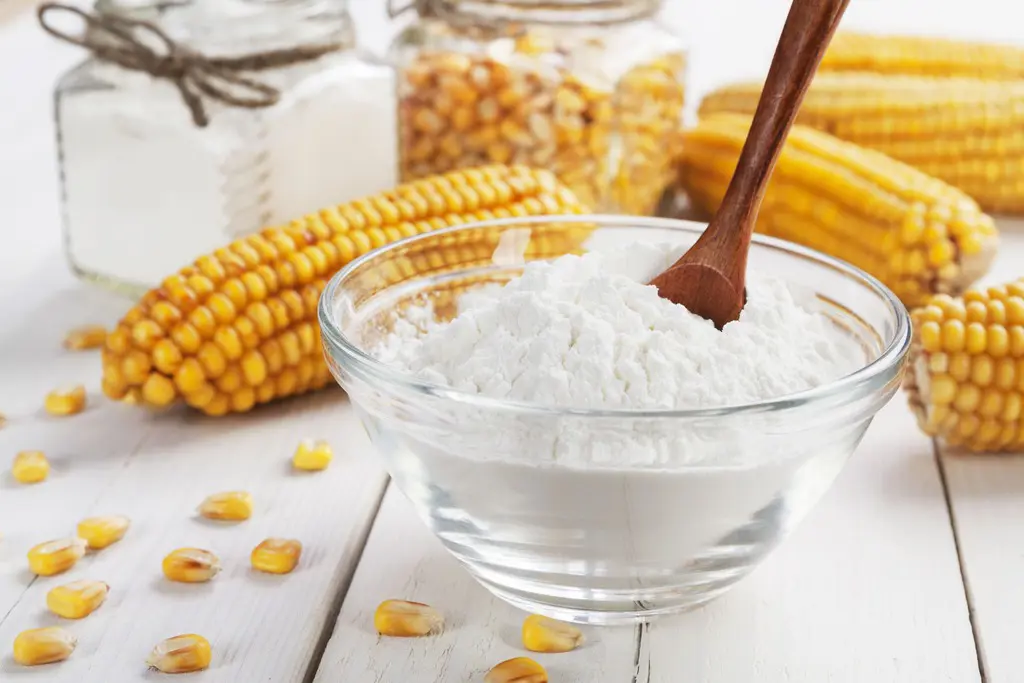
The 15 Best Substitutes for Cornstarch
Cornstarch is a kitchen staple known for its thickening prowess. But what if you're out or following a cornstarch-free diet? Fear not, bakers and cooks! This article explores 15 brilliant substitutes, from everyday pantry staples like flour to surpri...