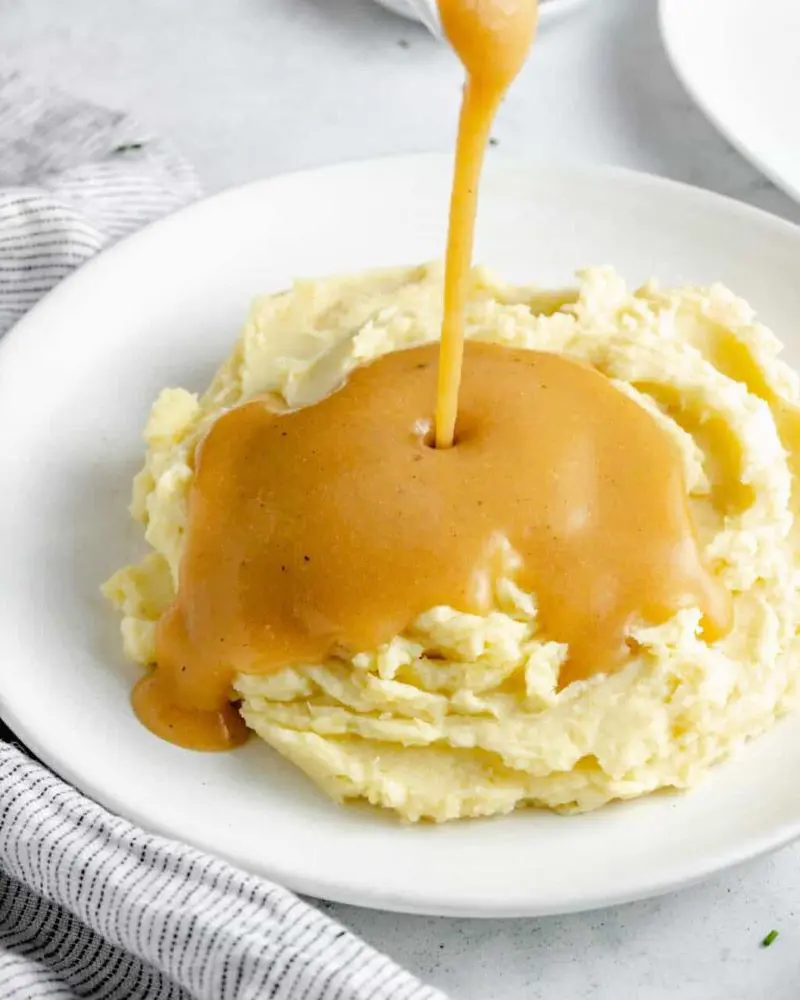
How To Make The Best Gravy That Goes With Everything
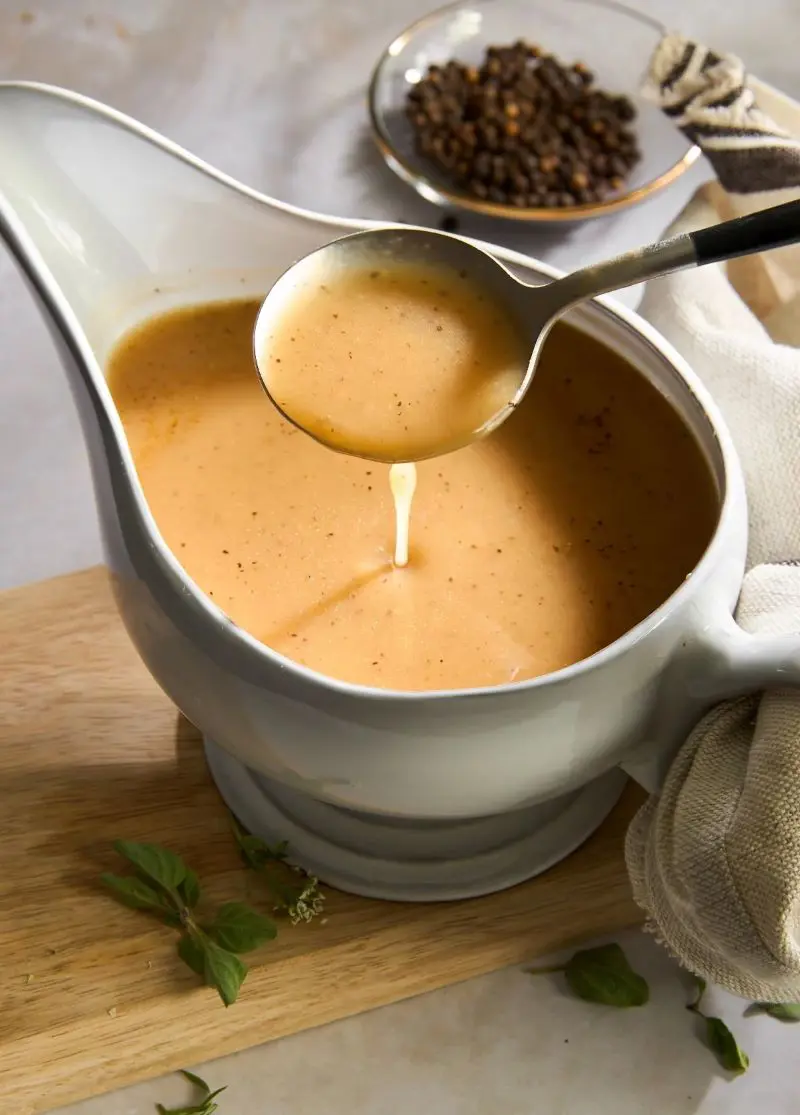
Been using those store-bought gravy packets? Try this game-changing homemade recipe that'll make those processed mixes seem like yesterday's news. Once anyone tries this healthier version, there's no going back to the packaged stuff.
Sure, it needs a bit of patience and time, but the results are worth every minute. Just watch how the kids' faces light up when this gravy hits the table. This is the best glossy sauce to go your mashed potatoes. Of course, it pairs perfectly with other dishes too.
Ingredients For The Best Gravy
The best part is that making gravy from scratch isn't rocket science. Skip the packet mixes - once you nail this homemade version, you're never going back. But first, you need to know what supplies you’ll need, which are:
- Broth or Stock: This is your gravy's backbone. Go for chicken, beef, or veggie - whatever matches your main dish. Store-bought is totally fine (Pacific Foods, Swanson, or Trader Joe's are great picks). Just grab the low-sodium kind so you can control the salt.
- Butter: This creates that silky texture and rich taste. It teams up with flour to thicken everything nicely. It's wise to use the unsalted version.
- Flour: Regular all-purpose works great here. Mixed with butter, it creates this thing called a roux that makes the gravy nice and thick. Think of it as the secret sauce behind the sauce.
- Bouillon Paste (optional): It's like a flavor bomb for your gravy. Better Than Bouillon brand is a go-to. Match it with your meat (chicken for poultry, beef for beef).
- Salt and Pepper: Don't skip these! They wake up all the flavors and make your creation taste like something you'd get at a nice restaurant.
- Fresh Herbs: Think of sage, thyme, or rosemary - they all work great. You can use dried ones too. While not absolutely necessary, they add that special touch that makes people ask for your recipe.
Tools Required
- Saucepan or Skillet
- Whisk
- Measuring Cups and Spoons
- Strainer or Sieve (optional)
- Wooden Spoon or Spatula
How To Make Homemade Gravy From Scratch
Making gravy from basics is a total game-changer in the kitchen. Takes just a few minutes, super straightforward, and honestly, once someone gets it right, they'll feel like a total kitchen boss.
The real trick is getting that perfect thickness and building up those rich flavors.
Ingredients
- 4 cups broth or stock (low-sodium)
- ⅔ cup (95 g) all-purpose flour
- 10 tablespoons (142 g) butter
- 1 tablespoon bouillon paste (optional)
- Salt and pepper to taste
- 1/2 tablespoon chopped fresh herbs
- Or 1/2 teaspoon dried herbs (optional)
Instructions
Step 1: Set up the Pan
Pick a medium saucepan or wide skillet with good sides. This gives you enough room to whisk without splashing. Set it over medium heat - not too hot, not too cold.
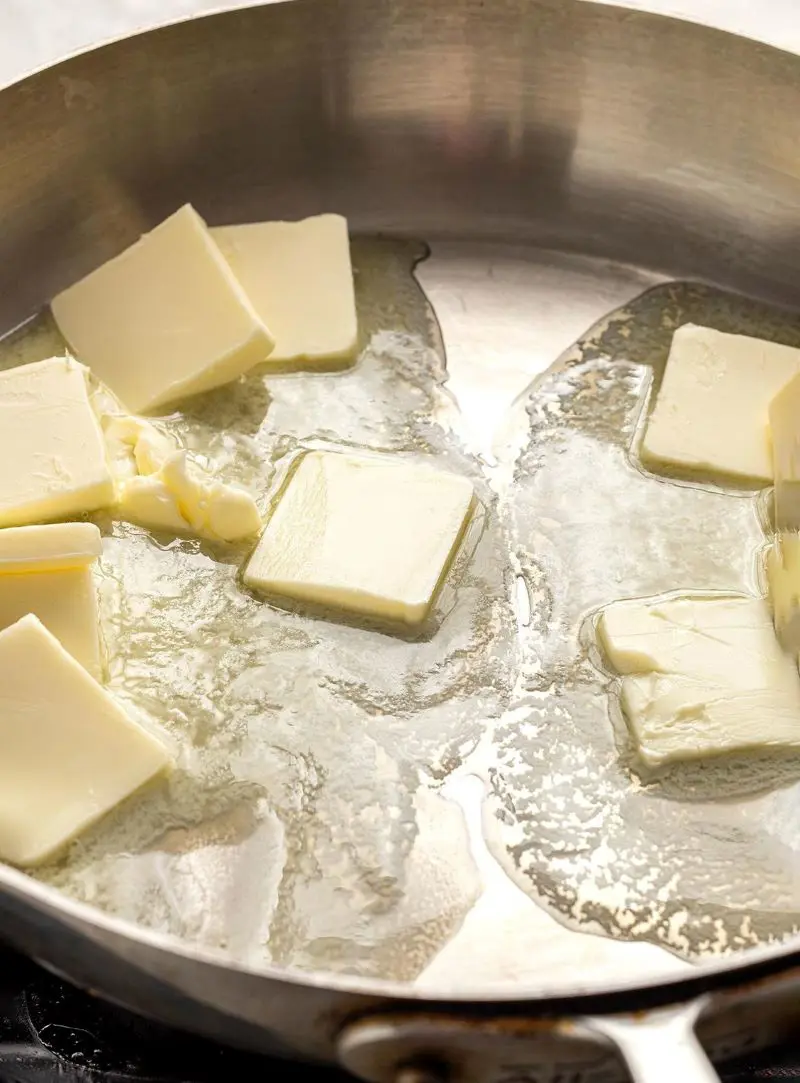
Step 2: Create Your Flavor Base
Melt the unsalted butter until it's sizzling but not browned. Watch it closely - butter can go from perfect to burnt pretty quick. You'll know it's ready when it's completely melted and making tiny bubbles.
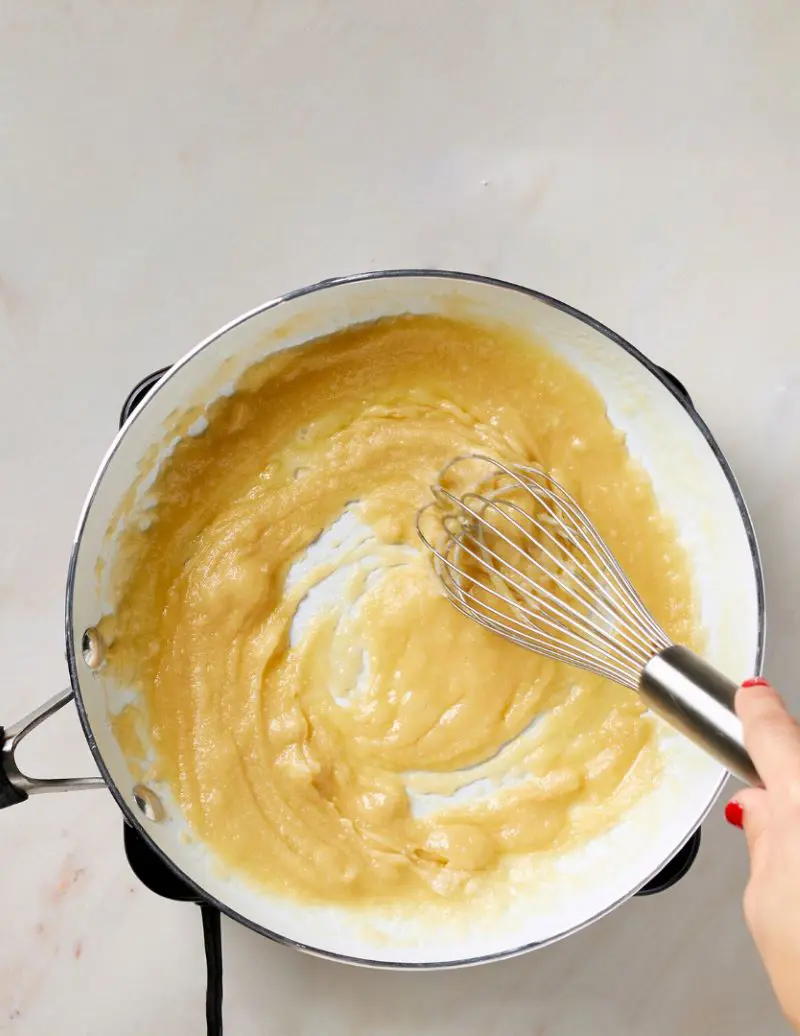
Step 3: Make Roux
Here comes the fun part - sprinkle that flour in while whisking constantly. Keep stirring until it forms a smooth paste - kind of like wet sand.
Let it cook for about 4-5 minutes until it turns golden brown and smells nutty. This is your thickener.
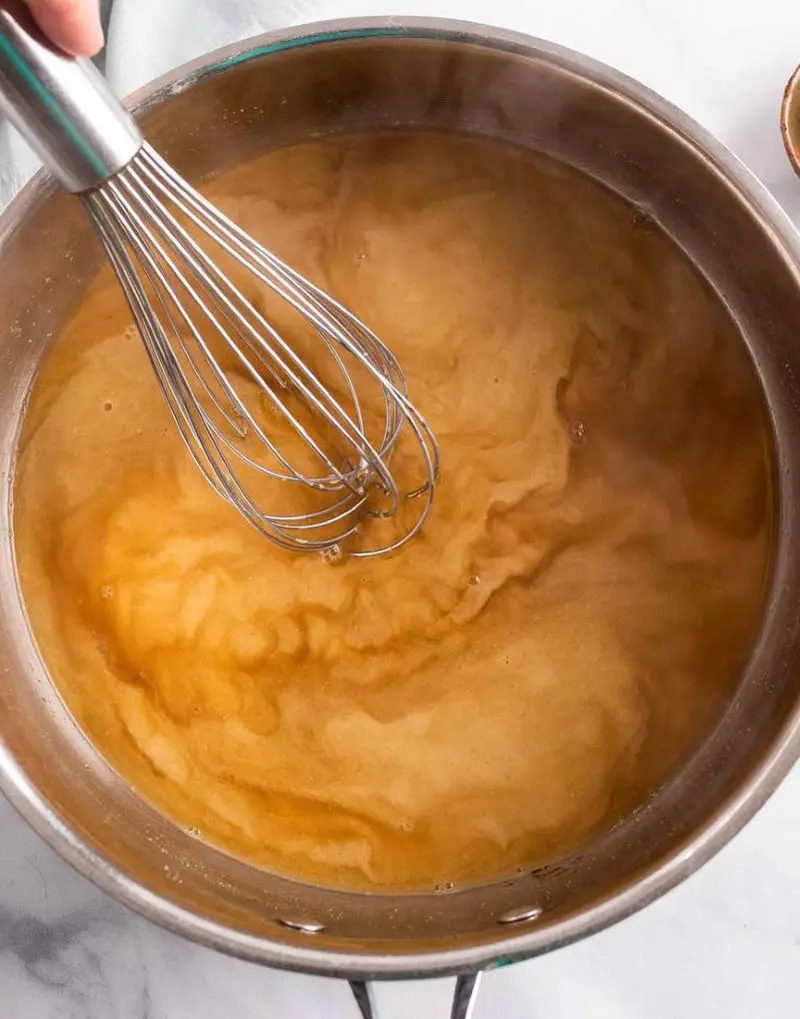
Step 4: Add Your Liquid
Here's the crucial part: Grab your warm broth (or stock, what you have or like) and start adding it slowly - about half a cup at a time. Keep whisking, do not pause here.
Don't panic if it looks lumpy at first - keep whisking and trust the process. Each addition should be smooth before you add more.
Step 5: Build The Flavor
Once all the broth is in, drop in a tablespoon of bouillon paste if you're using it. Keep stirring and simmering for maybe 3-4 minutes more. Pretty soon, the sauce turns silky smooth - perfect for coating the back of a spoon.
Step 6: Season And Finish
Add salt and pepper bit by bit, tasting along the way. If you have some herbs, toss them in now.
For fresh herbs you need to give them a minute to work their magic. Using dried ones - they'll need a little extra time.
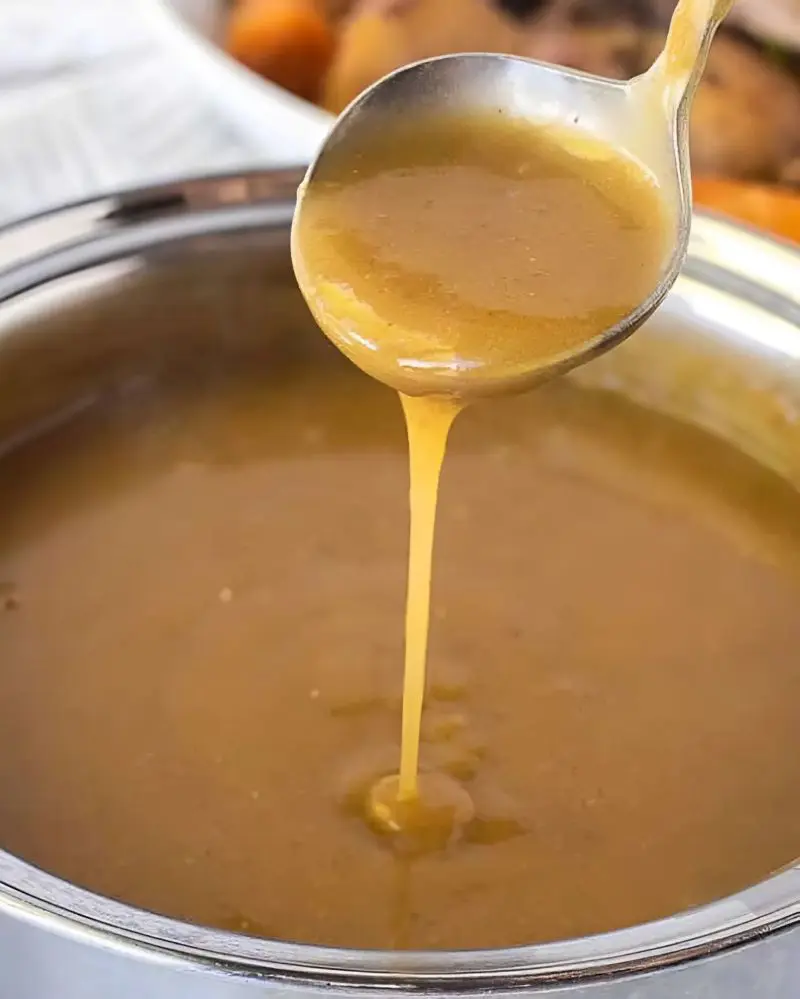
Step 7: Get The Perfect Consistency
Your gravy should smoothly coat the back of a spoon. If too thick, it's an easy fix! Add a splash more warm broth. It turned too thin - let it simmer a bit longer. Remember, it'll thicken as it cools, so err on the slightly thinner side.
Step 8: Keep It Warm
If you're not serving right away, just keep it on the lowest heat setting, giving it a whisk now and then. If it gets too thick while waiting, thin it out with a little warm broth.
How To Use Drippings In Gravy
Want to take your gravy to the next level? Let's talk about those amazing meat drippings - absolute gold when making incredible sauce!
Those drippings are pure magic. They're loaded with every bit of flavor from that roasted meat. No point in letting all that goodness go to waste!
- First things first - you'll need to deal with the fat. Pour your drippings into a fat separator if you have one, or pop them in the fridge until the fat floats to the top and hardens. Skim that off and save it - you can use it instead of butter in your gravy.
- Now for the fun part. Pour those strained drippings into a measuring cup and top it up with broth until you hit 4 cups. This mix is going to make your gravy taste amazing.
Even better if you got a Dutch oven or stainless steel pan you used for roasting. Skip the extra dishes and make your gravy right in there. All those browned bits stuck to the bottom serve as a pure flavor waiting to be unleashed.
Just remember - drippings pack more punch than plain stock, so go easy on the salt at first. Start small with seasonings - can't undo too much once it's mixed in!
Tips To Cook The Best Gravy From Scratch

- Keep Everything Hot: Your broth needs to be steaming hot when you add it to the roux. Cold liquid + hot roux = lumpy gravy. Simple as that. You keep it warm in a separate pot or zap it in the microwave until it's steaming.
- Don't Rush the Roux: This is where most people mess up. Give your flour and butter time to cook together - usually about 4-5 minutes. It should smell nutty and look golden brown. If you skip this step, your gravy will taste like raw flour.
- Whisk Wisely: Constant whisking is your best friend here. Don't stop, even if your arm gets tired. This prevents lumps and helps everything blend smoothly.
- Season as You Go: Take little tastes throughout the cooking process. Start light with those seasonings - easy to add more, impossible to take back once they're in.
- Fix Lumpy Gravy: Here's a fail-proof fix - pour that lumpy mess through a fine-mesh strainer. Push it through with the back of a spoon if needed. Your gravy will come out silky smooth on the other side. Works like magic every time!
- Watch Your Heat: Keep your heat at medium or medium-low. High heat can make your gravy break or get gloppy. If it starts bubbling too much, just turn down the heat.
Homemade Gravy Recipe Variations
Country-Style Sausage Gravy
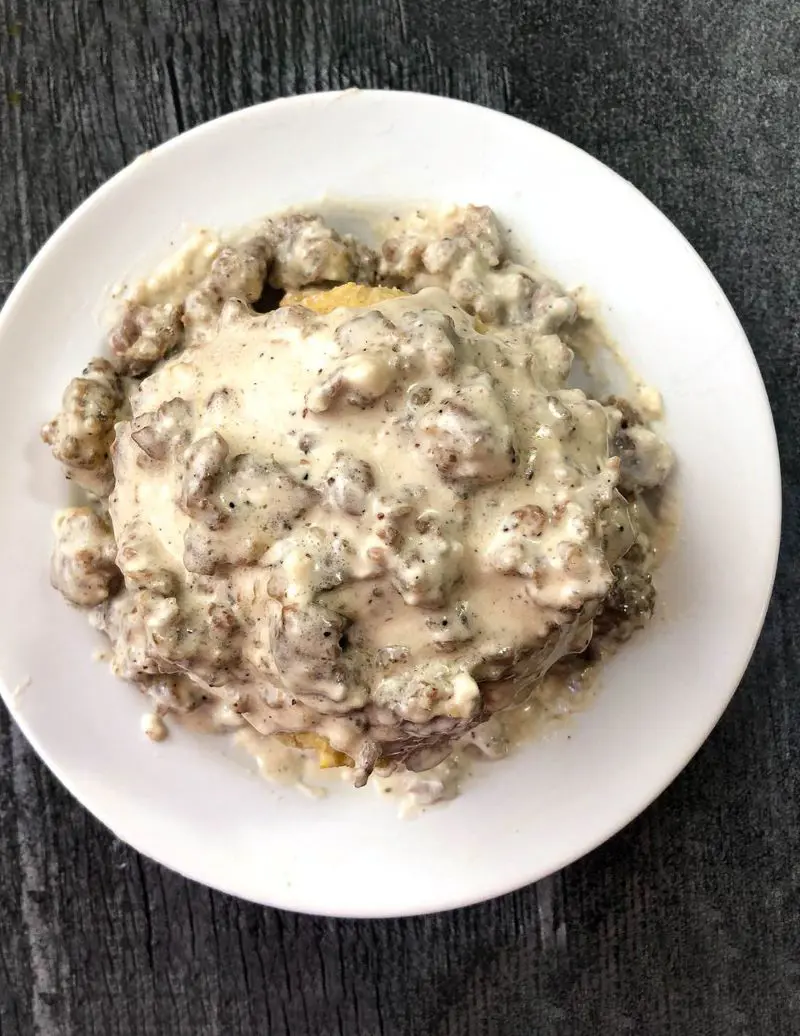
Swap out the butter for the fat from a pound of cooked breakfast sausage. Keep those sausage crumbles in the pan. Use milk instead of broth for that classic white gravy look, and crank up the black pepper.
This stuff is heaven on biscuits! Remember to keep your heat lower than usual since milk can burn easily. If you want it extra rich, simply throw in a splash of heavy cream at the end.
Cornstarch Gravy (Gluten-Free)
Skip the flour routine and grab cornstarch instead. But watch out - never dump cornstarch straight into hot liquid unless you want lumps.
Mix up 2 spoons of cornstarch with cold broth separately till smooth (people call this a slurry). Pour it into your simmering broth and watch it thicken like magic. This version turns out glossier and more translucent than flour-based gravy.
Mushroom Gravy
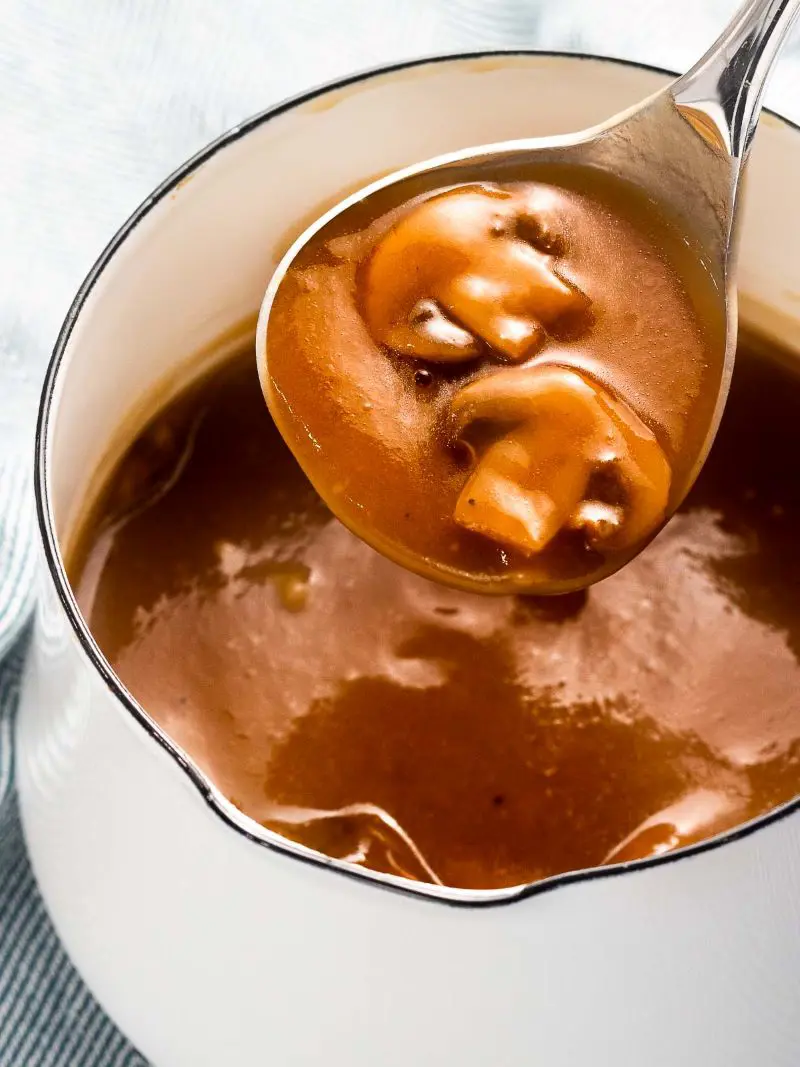
For vegetarians or mushroom lovers, here's a perfect trick: brown up loads of sliced mushrooms in butter till they're golden and shrunk.
Then just follow the usual steps but swap in vegetable broth as your base. The mushrooms add this amazing meaty flavor without any meat. Try mixing up different types of mushroom - shiitake and cremini together are incredible.
Onion Gravy
Here's a real crowd-pleaser! Start by slowly cooking sliced onions in butter until they're golden and caramelized - this takes about 15-20 minutes, but it is worth the wait. Make gravy like normal after that.
Kick it up with a splash of Worcestershire sauce at the end. This version's particularly awesome with bangers and mash or any roasted meat.
What To Serve With Gravy
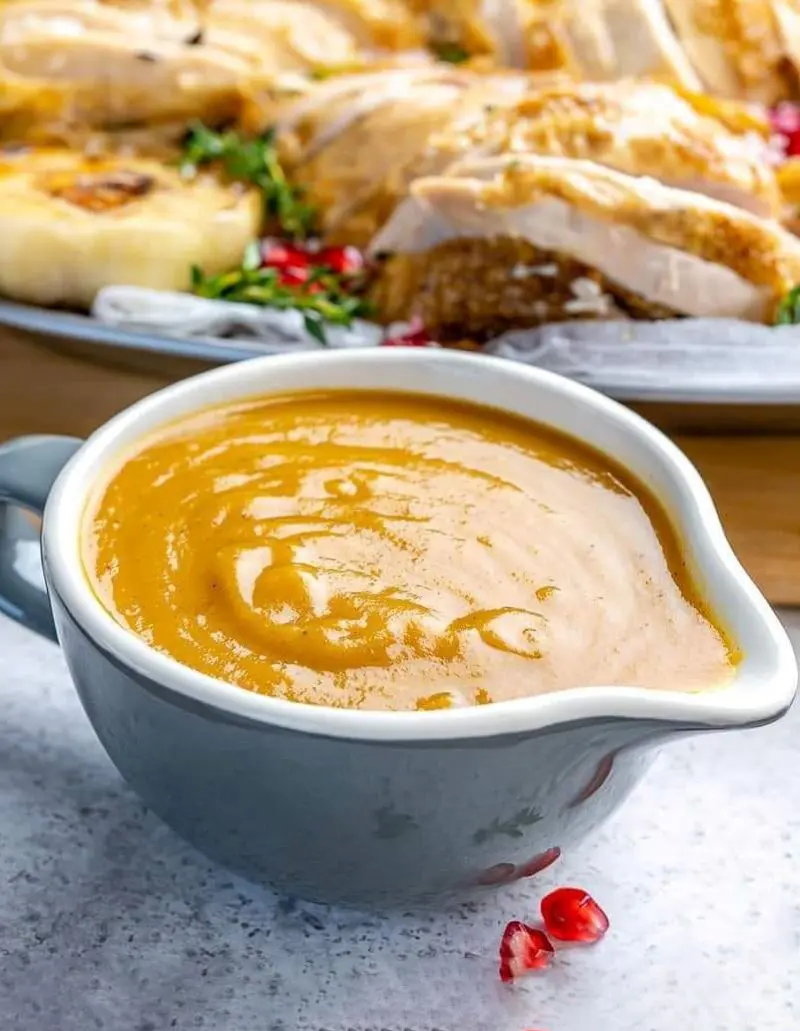
A good gravy just makes everything better! Pour it over your holiday turkey or drizzle it on roast beef. Something magical happens when hot gravy hits your plate - suddenly, your whole meal feels more special, more complete.
- Mashed Potatoes: Let's start with the classic! Make little wells in your mashed potatoes - they're perfect gravy pools. Nothing beats buttery, creamy potatoes soaking up all that tasty goodness. Works year-round but feels extra special on those cold winter nights.
- Roast: Nothing beats a Sunday roast with rivers of gravy flowing over perfectly cooked beef or chicken. Pour it generously so it seeps into everything on the plate - the meat, the roasted vegetables, even let it touch those Yorkshire puddings if you're feeling British!
- Sandwiches: Transform leftover roast turkey into something spectacular. Toast thick bread slices, pile on the warm meat, then ladle hot gravy all over. Add some crispy fried onions on top if desired. It's the perfect lunch for chilly days.
- Biscuits and Gravy: Not just for breakfast anymore! Fresh, flaky biscuits split open and smothered in hot gravy make an amazing meal any time of day. Try this with any type of gravy - not just the classic sausage version.
- Rice or Grains: Switch things up by pouring gravy over a bed of fluffy rice or quinoa. Think of it as a quick rice bowl - perfect way to use up extra gravy. Throw in some veggies and voila - dinner's ready.
Hot gravy is the best gravy, so always warm it up right before serving. And don't be shy with it - as there is a saying, "A little extra gravy never hurt anybody!"
How To Store and Freeze Gravy
Good news for gravy fans - you may definitely make extra and keep it for later! It's such a lifesaver for meal prep or planning those big family get-togethers.
Instead of creating fresh gravy every time, whip up a larger batch and store it properly. Having ready-to-use gravy makes those busy weeknight dinners so much less complicated.
In The Fridge (Short-Term Storage)
Let that gravy cool down first - but no more than two hours on the counter. Pop it in an airtight container or mason jar, leave some room up top.
Press a piece of plastic wrap right on the gravy surface before closing the lid. This stops that weird skin from forming. Keeps fresh for about 3-4 days in the fridge.
Quick tip: write the date on the container - helps track when it was made.
In The Freezer (Long-Term)
Want to keep it longer? Freezing gravy works great! Pour your cooled sauce into freezer-safe containers or heavy-duty bags. If using bags then squeeze out all that air - air is the enemy of frozen foods!
Leave about an inch of space at the top because gravy expands when frozen. It'll stay good for up to 3-4 months in the freezer. Again, don't forget to label it with the date!
Reheating Your Stored Gravy
Getting your gravy back to its smooth, delicious form is straightforward but needs attention. If it is been in the fridge, cook it at low heat in a saucepan.
Keep whisking while it heats as it breaks up any lumps from storing. If it's too thick, upload a splash of warm broth or milk to thin it out.
For frozen gravy, thaw it overnight in the fridge first. Never try to speed-thaw gravy at room temperature - that's asking for trouble! Once thawed, heat it up using the same method as refrigerated gravy.
Keep whisking until it's smooth and heated through. If your gravy is separated during storage (totally normal!), just keep whisking while it heats - it'll come back together nicely.
Recent posts
Recipe
Recipe
How To Cook Southern-Style Collard Greens
Cooking Southern-style collard greens is a beloved tradition of Southern cuisine, known for its comforting, rich, and savory flavors. These greens are slowly simmered until tender, resulting in a hearty and flavorful dish. Often prepared with smoked ...
Recipe
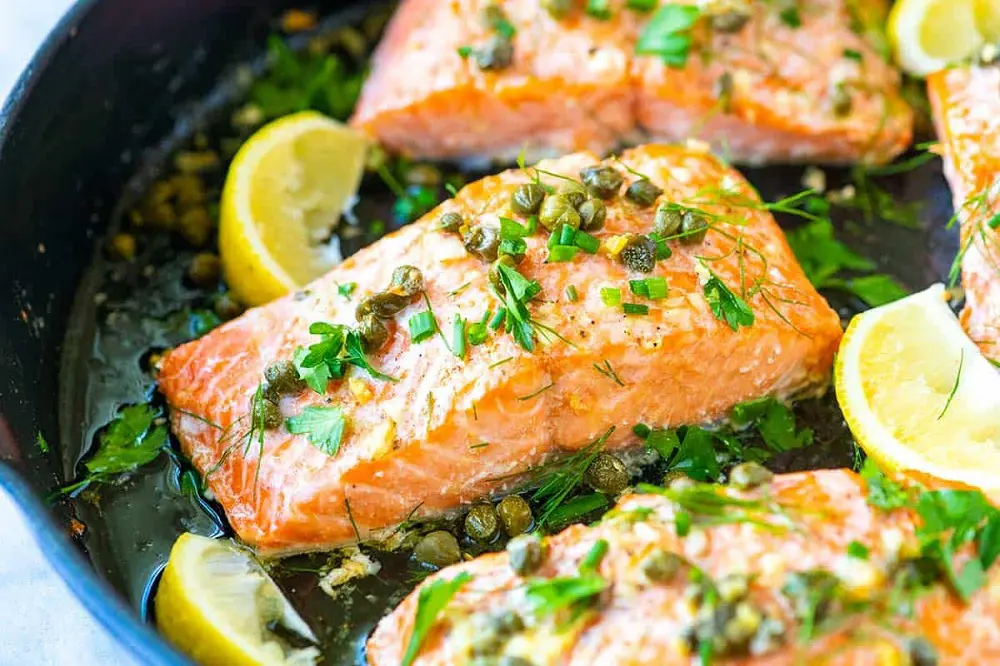
Best Herbs and Spices For Seasoning Salmon
Salmon is the culinary chameleon of the seafood world. It goes with everything, from light summer salads to comforting pasta dishes. Need a fast salmon fillet sizzling and without complicated recipes? The secret lies in perfect seasoning. With the ri...
Recipe
Garlic Butter Salmon Recipe
Garlic butter salmon is not only a culinary delight but also a nutritional powerhouse, offering a delectable blend of flavors and numerous health benefits. This dish combines the rich taste of salmon with the aromatic and savory notes of garlic ...

Recipe
A Comprehensive Guide To Perfect Salmon Gravlax
Salmon gravlax is a luxurious, flavorful dish that captures the essence of Scandinavian culinary tradition. This delicacy, made by curing salmon with a mixture of salt, sugar, and dill, is surprisingly easy to prepare at home. In this comprehensive g...
Recipe
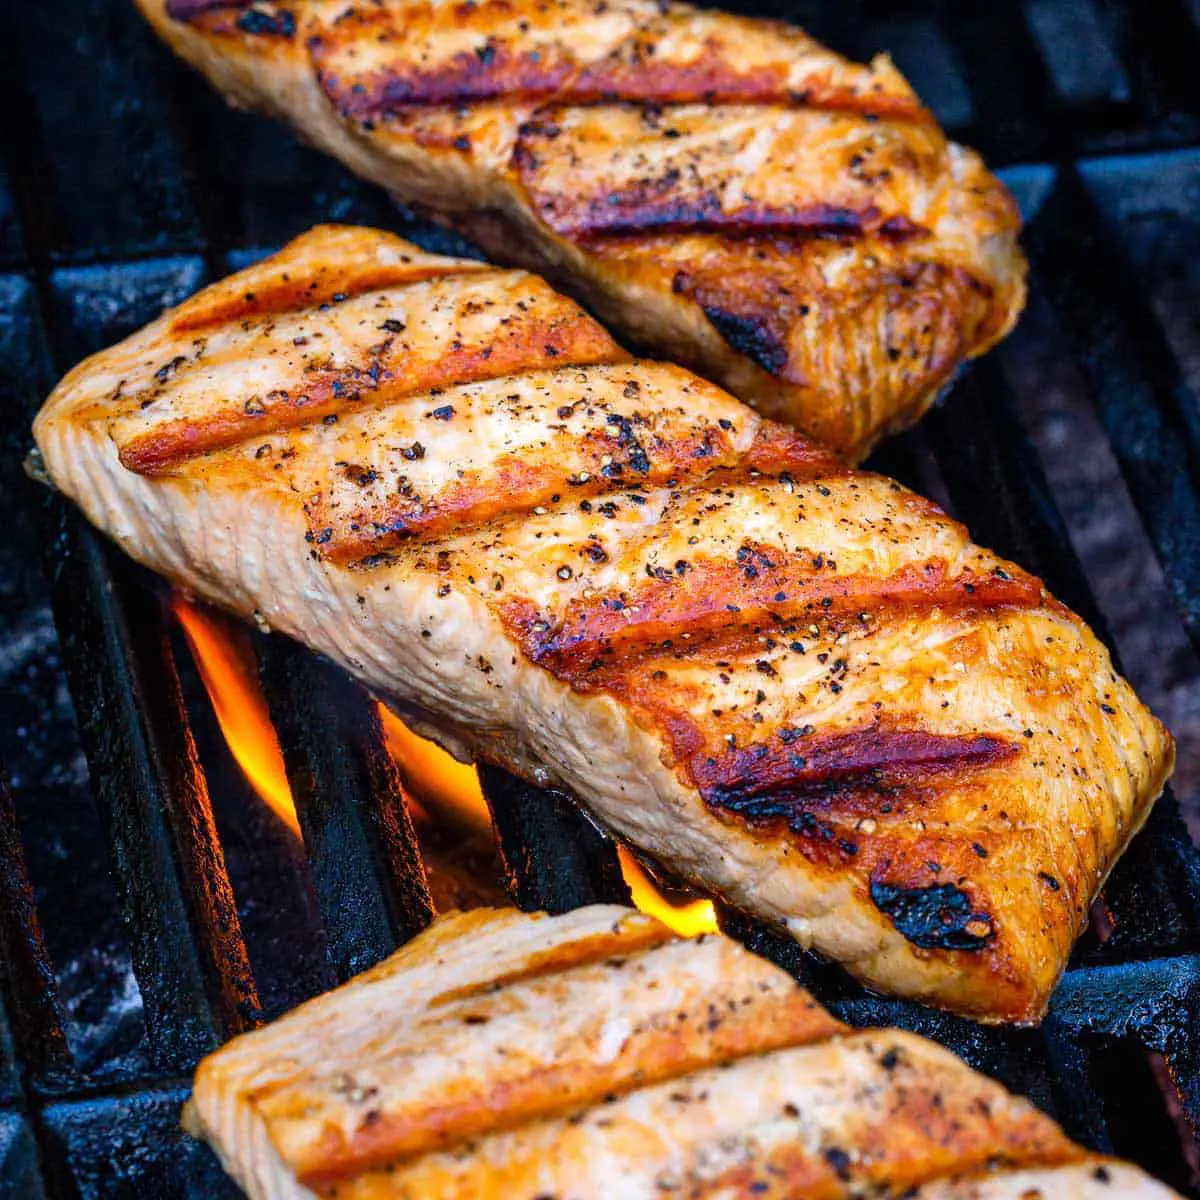
14 Grilled Salmon Recipes For Perfect Summer Dinner
Salmon is possibly the most reliable dinner option for many households throughout America. So, we are confident that you already have an array of salmon-baked recipes on your corner. What we have brought for you today are grilled salmon recipes so yo...

Recipe
Best Smoked Salmon Appetizer Recipe
Smoked salmon appetizers are a timeless and elegant choice for any gathering. These offer a perfect balance of rich, smoky flavors and fresh, vibrant ingredients. These have become synonymous with casual brunches as well as upscale gatherings because...