How To Make Roux At Home
Have you ever wondered what gives your favorite soups and sauces that smooth, thick texture? That’s roux! It’s nothing complex - just a thickening agent made from a simple cooked mixture of equal parts flour and fat.
When you mix flour with fat, something special happens. The fat actually coats each tiny bit of flour, which means no more lumpy sauces! So if you've ever been frustrated by bumpy gravies or soups, this is your solution.
Types Of Roux
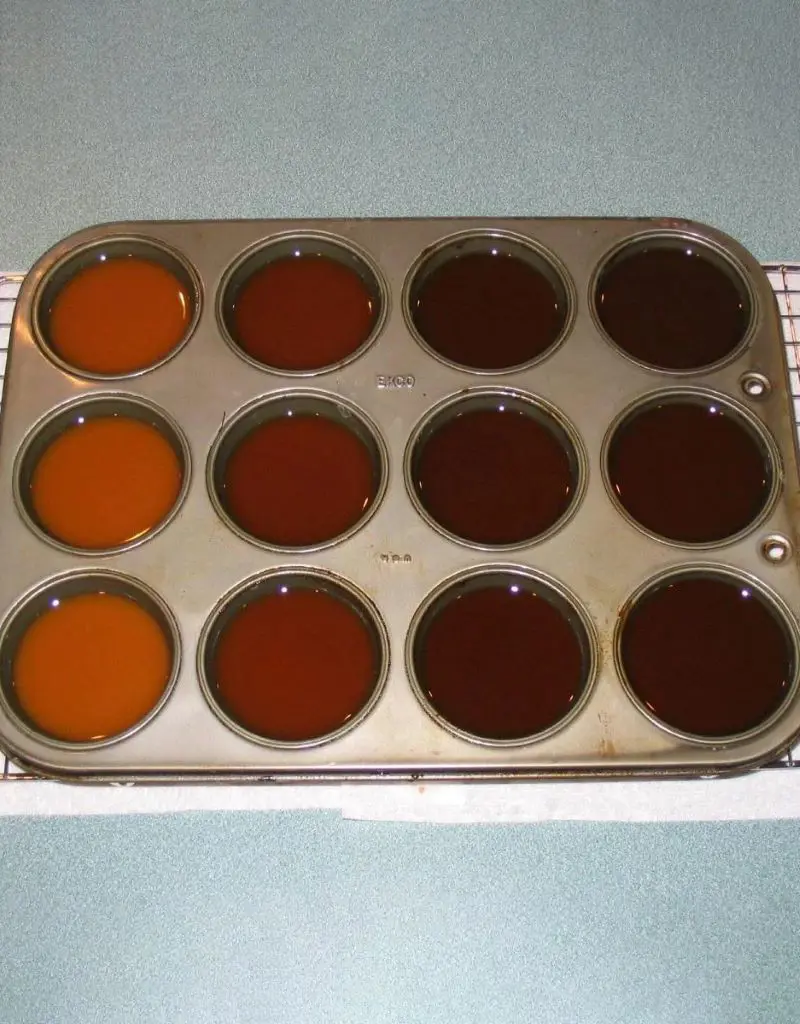
A roux is a trusty kitchen trick that combines flour and fat, developing a thickening agent for plenty of dishes. Cooking it for different amounts of time lets you take it from a light to a rich brown version.
These can’t be used as replacements for each other because their flavors are very different. The time spent making them also determines their color, taste, and thickening strength, making each one special.
White Roux
This is the most common type of roux. Cooked for just a few minutes, it maintains a pale color and neutral flavor. Chefs love it for creating silky smooth sauces that don't distract from other ingredients.
White roux shines in dishes like cheese sauces, bechamel, and homemade gravies. It provides maximum thickening ability with minimal flavor interference.
It works well in dishes where you don't want to add extra color or a strong taste. As you cook it longer, the roux becomes smoother and more refined.
Blonde Roux
Blonde roux takes a bit more time to cook than white roux. It develops a light, nutty taste during the cooking process. This kind of roux is ideal for veloute sauces and dishes that need a slightly more developed flavor.
It has less thickening power compared to white roux but adds more depth to the flavor of your dish. Chefs appreciate blonde roux for its ability to add a subtle, toasted note to sauces and soups.
Brown Roux
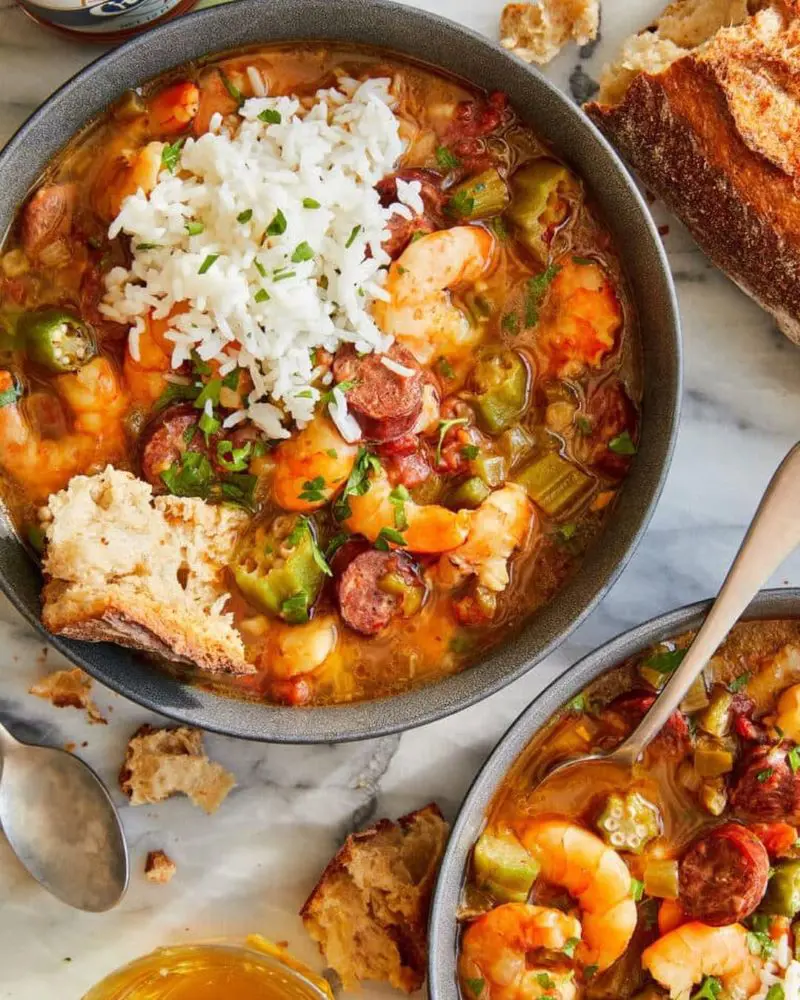
Cooked until it reaches a deep, mahogany color, this roux brings intense, nutty, almost roasted notes to dishes. It's the secret weapon in traditional gumbo, adding complexity and depth that makes Louisiana cuisine legendary.
Brown roux is the least common and used in only a few cooking applications. While it has the least thickening power, it makes up for it with bold, robust flavor.
Sauce espagnole and other rich, dark sauces rely on brown roux to create their signature deep, complex taste.
Ingredients In A Roux
With just two basic items from your pantry, you can create a magic base that makes sauces thick, rich, and delicious. Passed down through generations this technique is incredibly easy but can make even the simplest meal taste amazing.
The best part is how flexible roux can be. Making healthy soups and sauces just got easier. This is a basic cooking technique that helps you create smooth, thick dishes without hassle.
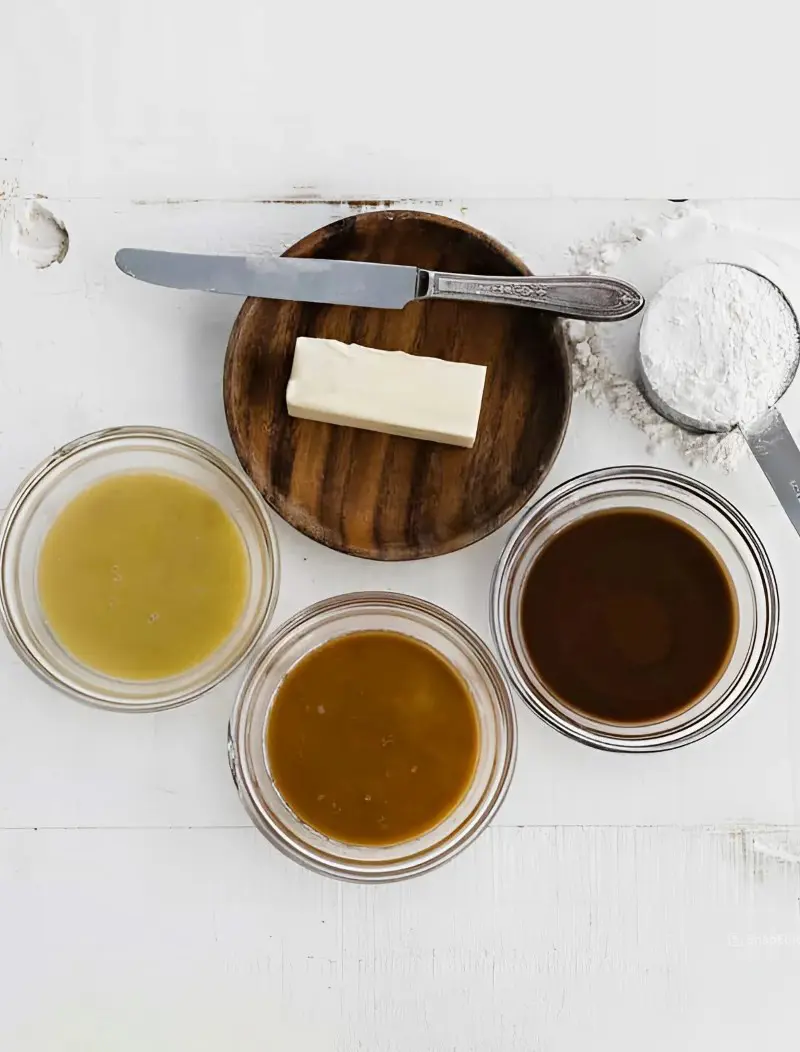
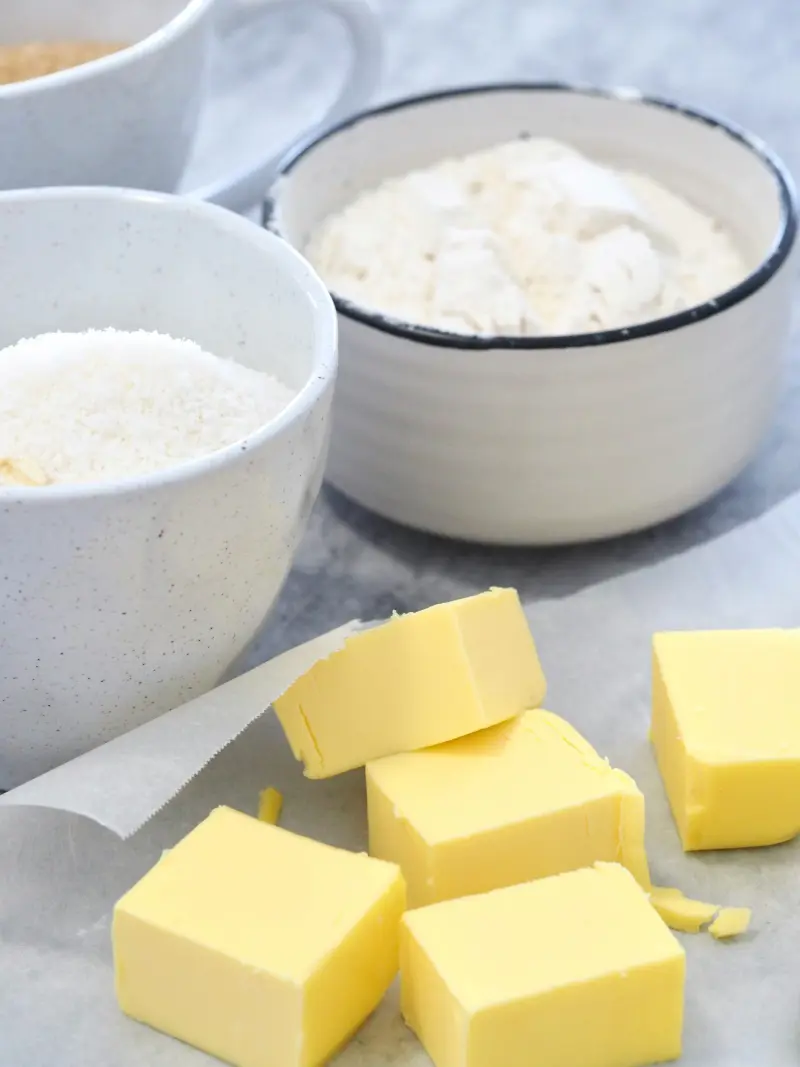
- Fat: Butter is the most popular for making roux. It's classic, flavorful, and works perfectly in most recipes. But you're not stuck using only butter. Vegetable oils, bacon fat, and duck fat work great too. Each one adds its own special flavor to your cooking. Bacon fat delivers a rich, smoky depth, while clarified butter provides a light and pure flavor.
- Flour: All-purpose flour is all you need to start cooking roux. It's readily available and provides the perfect thickening power. The flour's role is crucial - it absorbs the fat and creates a smooth, thick base. White flour works best, giving you the most consistent results in your cooking.
How To Make Roux For Soup
This is one of the easiest cooking skills you'll learn. Even if you're not confident in the kitchen, you can master roux quickly. It doesn't take much time or effort.
The magic happens with just a pan, some fat, flour, and a whisk. No special equipment needed, no complicated techniques - just basic kitchen tools and a little patience.
Instructions
Step 1: Choose Your Fat
Start by selecting your fat. Most people use butter, but don't stop there - vegetable oil works great for neutral flavor, while bacon fat adds a smoky punch. Clarified butter is perfect for those wanting a cleaner taste.
Choose an unsalted fat so you can control the salt level. Grab a heavy-bottomed pan - cast iron or a sturdy saucepan works best. These pans distribute heat evenly, preventing hot spots that could burn your roux.
Step 2: Measure Your Fat and Flour
Precision matters in roux-making. You'll want equal parts fat and flour. Most recipes start with 1/4 cup of each - this works for most home cooking needs. Having everything ready helps you stay organized.
Preparing your measurements beforehand can make a big difference. It keeps everything organized and saves you from rushing around later. Have your flour measured and set aside before you begin.
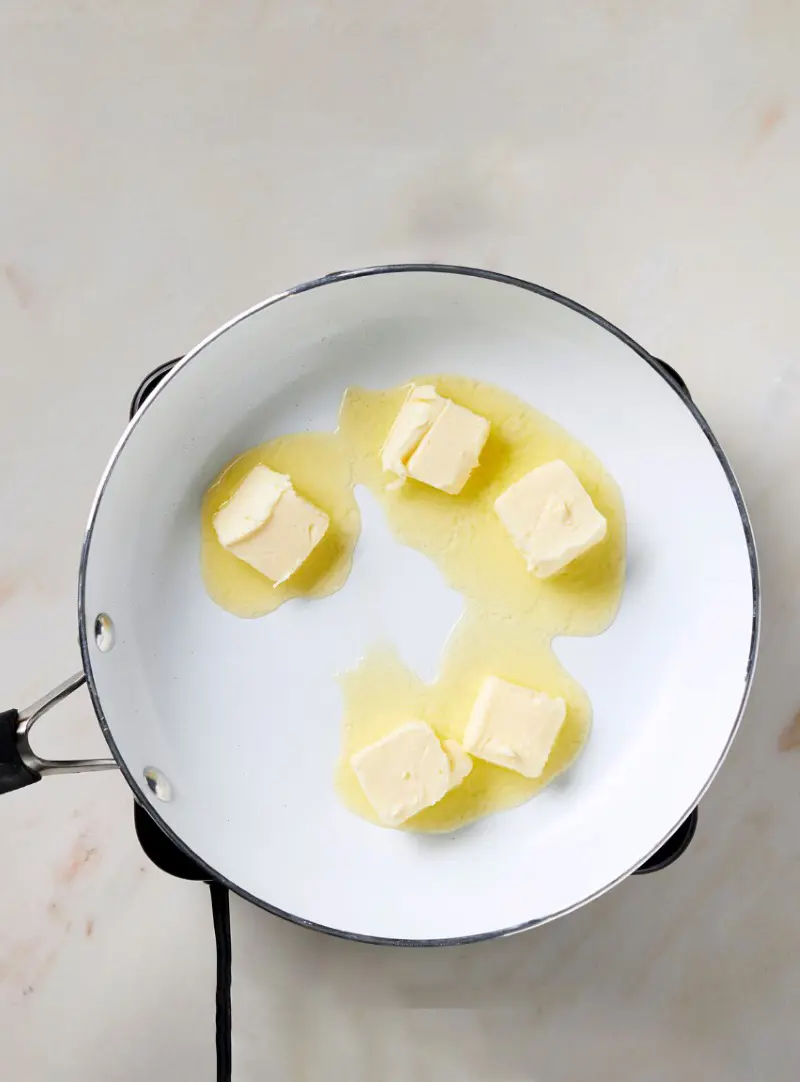
Step 3: Melt the Fat
Now for the fun part. Place your pan on medium-low heat - remember, slow and steady wins the race. If you're using butter, watch it melt carefully. You want a smooth, even melt without any browning.
Swirl the pan gently, coating the entire bottom. This creates a perfect canvas for your roux. The low heat is crucial - it helps you control the cooking process and prevents burning.
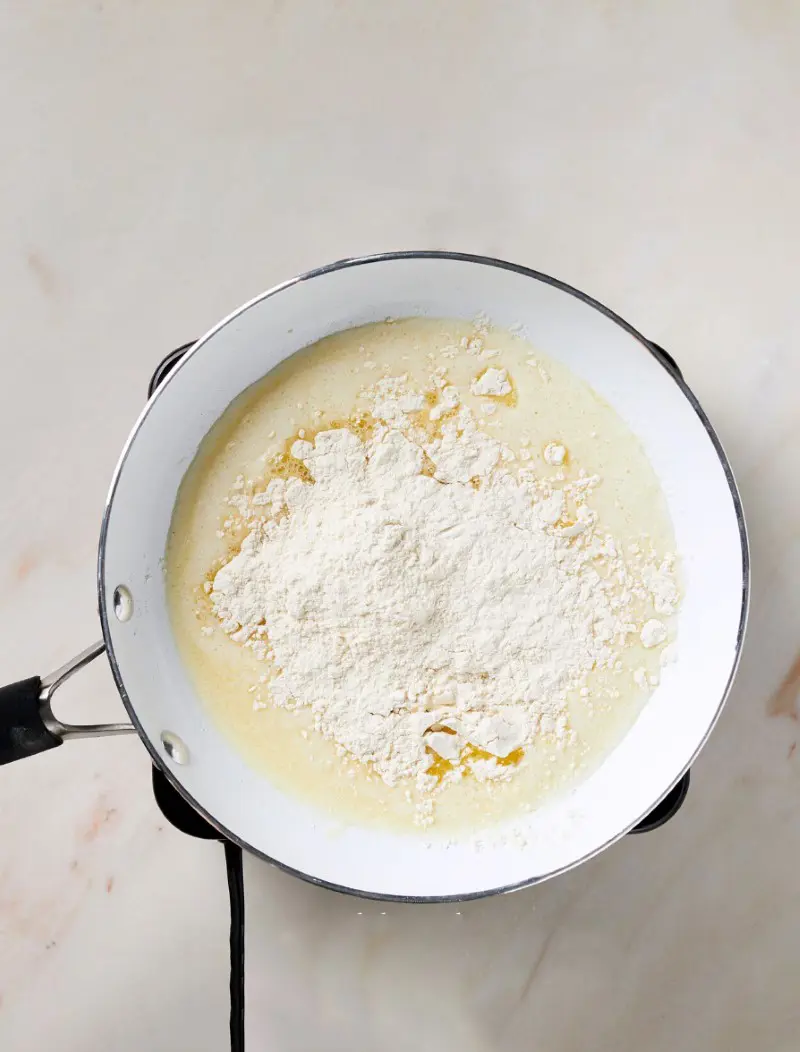
Step 4: Add the Flour
Once the fat is melted, slowly sprinkle the flour. Use a whisk to combine the fat and flour immediately. Stir constantly to prevent any lumps from forming. The flour should completely absorb all the butter, normally 30 seconds to 1 minute.
The goal is a smooth paste with no lumps - what chefs call a slurry. Keep the heat low and your whisking steady. Think of it like stirring a delicate mixture that needs your full attention.
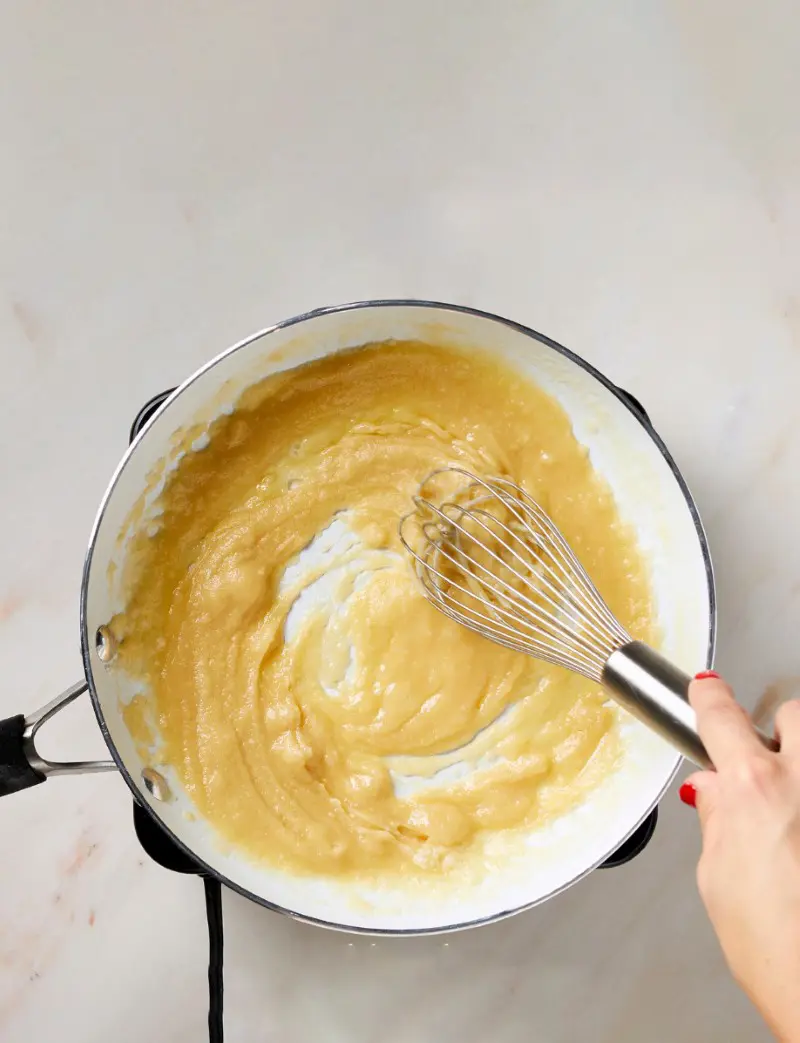
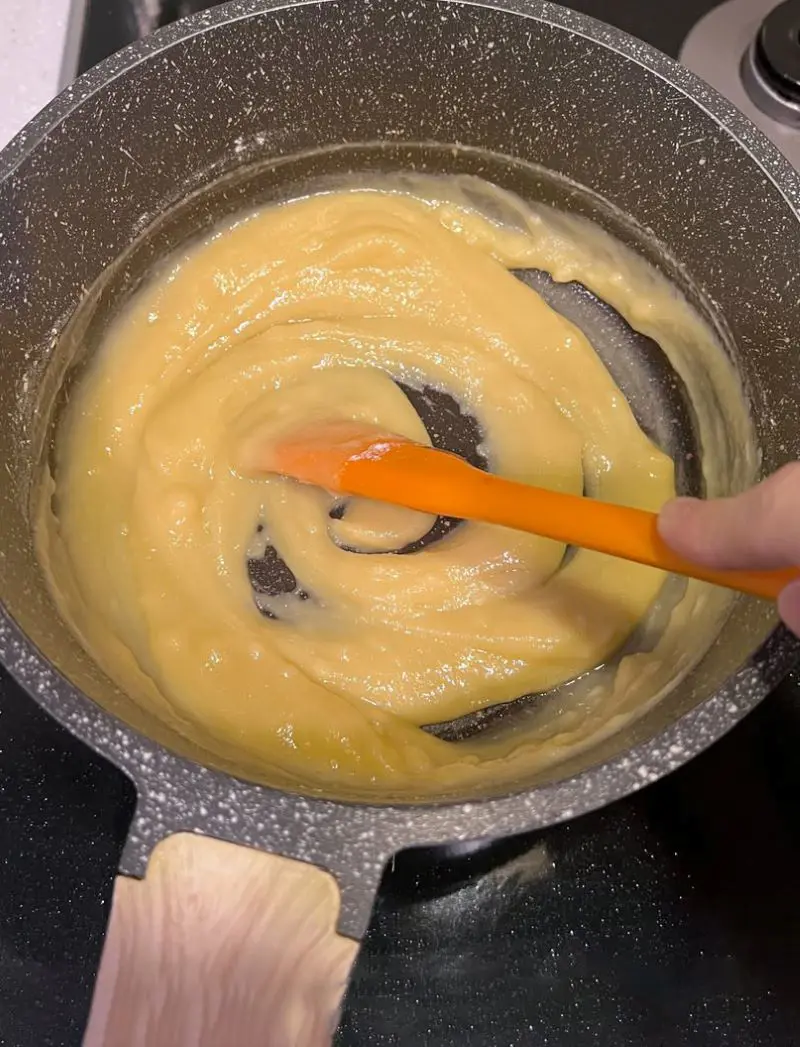
Step 5: Cook the Roux
Keep whisking the mixture continuously. The cooking time determines the roux's color and flavor. For a white roux, you'll cook it for 2-3 minutes, which gives it a pale, creamy appearance.
Want something with more flavor? Cook for 4-5 minutes to get a golden color. For a deep, rich roux, spend 10-15 minutes cooking, watching it turn a rich brown.
Watch the color carefully. The mixture will change from a pale, paste-like consistency to a deeper color. Keep the heat low and stir constantly to prevent burning. If you see dark spots or smell burning, start over.
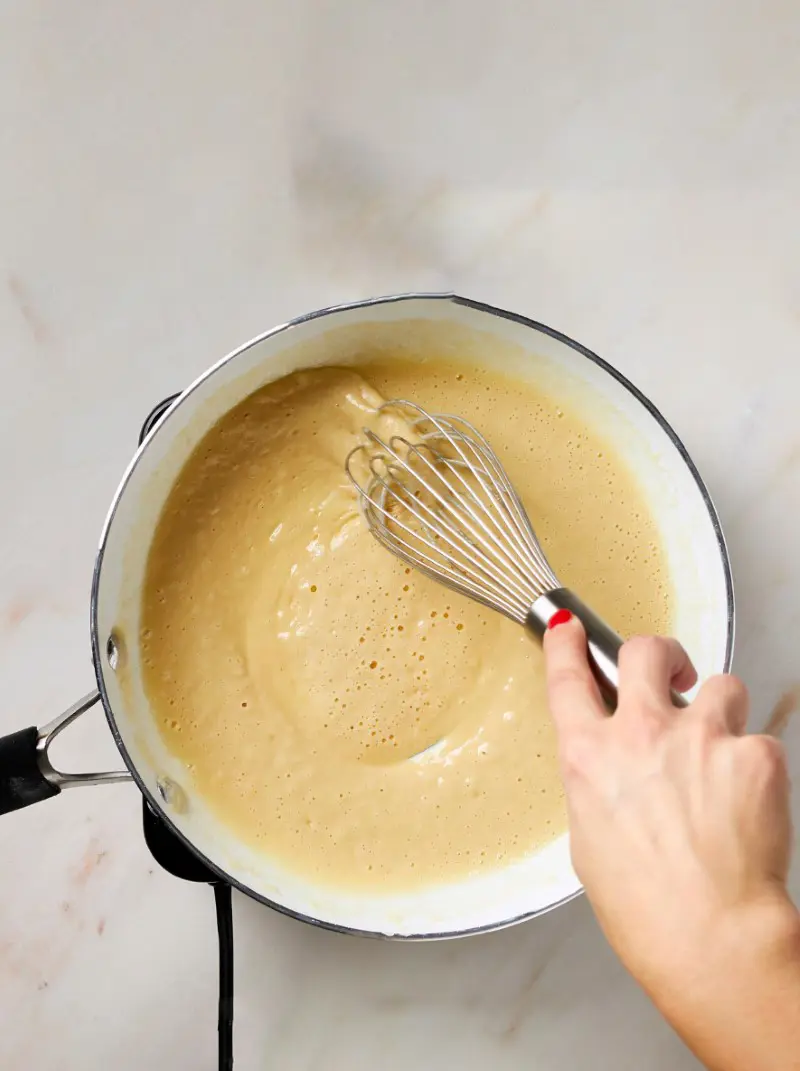
Step 6: Check Doneness
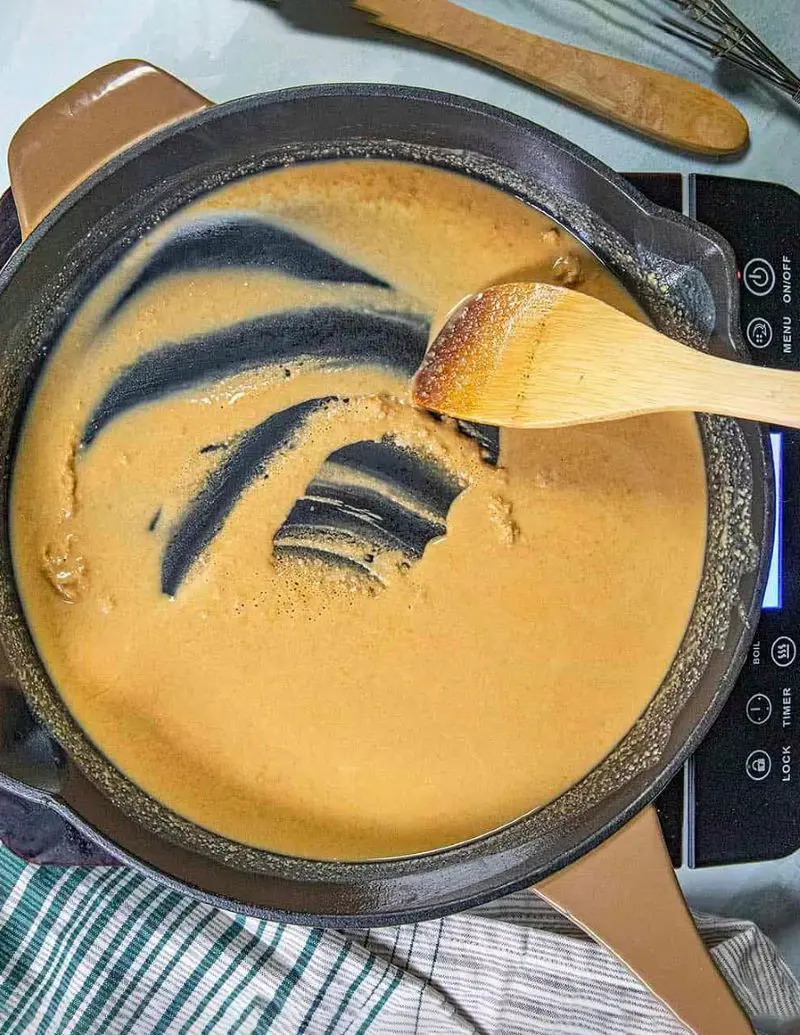
The roux is ready when it reaches your desired color and has a smooth, paste-like consistency. For a white roux, it should look like pale cream. A blonde roux will have a light golden color.
A brown roux will be a deep brown, almost like peanut butter. Trust your senses!
Step 7: Adding Liquid
Once your roux is ready, add liquid slowly, whisking constantly. Use stock for savory sauces, milk for creamy ones. Pour in a little at a time, whisking to prevent lumps.
The mixture will thicken and become silky smooth. This is the moment that makes all your careful cooking worthwhile.
How To Make Roux Without Flour
Roux without flour is totally possible and can be great for people avoiding gluten or looking for alternatives. Cornstarch and arrowroot powder are the top substitutes for traditional flour-based roux. The key is creating a smooth mixture before cooking.
When you're starting to make a cornstarch (or arrowroot) roux, begin by blending the powder with cold water. Stir it together until you get a smooth, thin paste without any lumps - this is called a slurry.
Once your slurry is ready, add it to your heated fat in the pan. The mixture will thicken as it cooks, just like a traditional flour roux.
Cornstarch works well for light, clear sauces and has excellent thickening power. Arrowroot is a bit more delicate and works great in fruit-based sauces or dishes with more subtle flavors.
Both options are gluten-free and can be used in exactly the same way as a flour roux. Just remember to mix with cold water first and stir constantly while cooking.
How Long Does It Take To Make A Roux
Creating a roux isn't tough but timing matters a lot. The duration it takes relies upon the type of roux you are preparing and a few critical factors. You'll generally spend around 15 mins from start to finish, though this can alternate.
Roux Cooking Times:
- White Roux: 2-3 minutes
- Blonde Roux: 4-5 minutes
- Brown Roux: 10-15 minutes
Several factors can impact your roux-making duration. The heat intensity matters most - lower heat means slower cooking but less risk of burning.
Your pan type also plays a role. Cast iron and heavy-bottomed pans distribute heat more evenly, which can change cooking times. The amount of roux you're making affects timing too. A smaller batch might cook faster than a larger one.
To confirm your roux is done, use multiple checks. Look at the color - it should match the type of roux you're making. Smell is crucial too. A white roux will smell like raw flour, while a brown roux develops a rich, toasted smell.
The texture will change too - it should look smooth and paste-like with no lumps.
Watch carefully and stir constantly. One moment of distraction can turn a perfect roux into a burnt mess. Remember, practice makes perfect. Your first few rouxs might not be ideal, but you'll quickly get a feel for the timing and technique.
Each time you make a roux, you'll become more confident in reading its changes and knowing exactly when it's just right.
Tips For the Best Recipe For Making Roux
- Temperature Control: Cooking at high heat is a big mistake. Shoot for medium-low so that the flour cooks uniformly. If the pan gets too hot, the roux may burn and no one wants a bitter flavor that will spoil the entire dish. A steady, gentle heat gives you more control.
- Constant Whisking: Keep it moving constantly - and we mean constantly. Stay focused in the kitchen. Keep whisking nicely to prevent the roux from sticking to the bottom of the pan and to ensure it cooks evenly throughout. It breaks up any potential lumps and helps the flour cook uniformly.
- Fat Quality Matters: Butter gives the best flavor, but clarified butter is even better. It has a higher smoke point and won't burn as easily. If you're making a darker roux, consider using oils with higher smoke points like vegetable oil. Experiment with different fats to find your favorite.
- Pan Selection: Pick a heavy-bottomed pan. Cast iron or stainless steel pans spread heat more evenly, giving you better control. Thin pans create hot spots that can burn your roux in seconds.
- Prep Before You Start: Have all your items measured and ready before you begin. Roux requires your full attention, so you can't be running around measuring things mid-cooking. A calm, prepared workspace is a goal here.
- Practice Makes Perfect: Don't get disappointed if it does not work out at first. Roux making is a skill that gets better with time. Each time you make it you will get more skilled at noticing the small changes in coloration, smell, and texture.
- Clean as You Go: Keep a damp towel or paper towel close by. Roux can splatter and stick to your stove and surrounding areas. Wipe down surfaces immediately to prevent burnt residue from becoming hard to clean.
Ways To Use Roux
- Sauce Thickener: Roux is the ultimate way to thicken sauces. It turns thin liquids into rich, smooth sauces. It brings the components together, creating a velvety, smooth texture that coats the back of a spoon beautifully.
- Soup and Stew Base: Roux helps thicken the liquid and creates a more substantial, satisfying meal. The fat in the roux helps carry flavors, making every spoonful more delicious. Roux is the key to turning humble soups like chicken pot pie and gumbo into hearty favorites.
- Casserole Binder: Casseroles depend on roux to hold everything together. It creates a creamy sauce that connects elements like vegetables, meat, and cheese. The roux stops your casserole from becoming watery and provides that perfect, comforting texture we all enjoy.
- Gravy Maker: Thanksgiving would not be the same without gravy, and roux is crucial. It turns meat drippings into a sauce that really is ideal for pouring over turkey, mashed potatoes, or something else on your plate. The roux helps the gravy to stick with food instead of running everywhere.
- Pot Pie Filling: Pot pies need a thick, creamy filling, and roux is the key factor. It creates a sauce that is thick enough to stay within the pie but still so creamy and delicious.
- Mac and Cheese Base: Your favorite mac and cheese starts with a roux. It’s the secret to a creamy cheese sauce that wraps each single noodle. The roux keeps the texture silky and easy, stopping the cheese from getting grainy while clinging perfectly to the pasta.
- Vegetable Sauce: Roux helps create ultra rich sauces for vegetables that make even the most boring produce taste remarkable. From creamed spinach to cauliflower cheese, roux transforms simple vegetables into rich, pleasant dishes.
- International Dish Thickener: Almost every cuisine has a dish that uses roux. From French mother sauces to American comfort food, roux is a universal cooking technique.
How To Store Roux
It's smart to make a batch of roux if you have some extra time, as you can save it for later. Having it ready in the freezer means you're always organized to make a quick sauce or thicken a soup in minutes.
With a little preparation, you'll have ready-to-use roux on every occasion you want it. Different storage techniques work best for different types of roux, so here’s everything you need to know.
Refrigerator Storage
After making your roux, let it cool completely. You have two main options for cooling. First, you can spread it on a baking sheet to cool quickly and evenly. Alternatively, pour the roux into ice cube trays for convenient portion sizes.
Once cooled, transfer to an airtight container. Refrigerated roux will last about a week.
Freezer Storage
Freezing is the best long-term storage method. Those roux cubes from the ice cube tray work perfectly here. Move the frozen cubes into a freezer-safe bag or an airtight container.
Label with the type of roux and date. Frozen roux can last up to 3 months without losing quality.
Remember the type of fat you used impacts storage. Roux made with vegetable oil can sit at room temperature for a few weeks. However, roux made with butter or animal fat must be refrigerated or frozen.
Plan ahead and thaw your frozen roux in the fridge overnight for easy use. Plus, check for any off smells or signs of mold. If anything seems suspicious, it's best to throw it out. Fresh roux should smell neutral and look consistent.
Recent posts
Recipe
Recipe
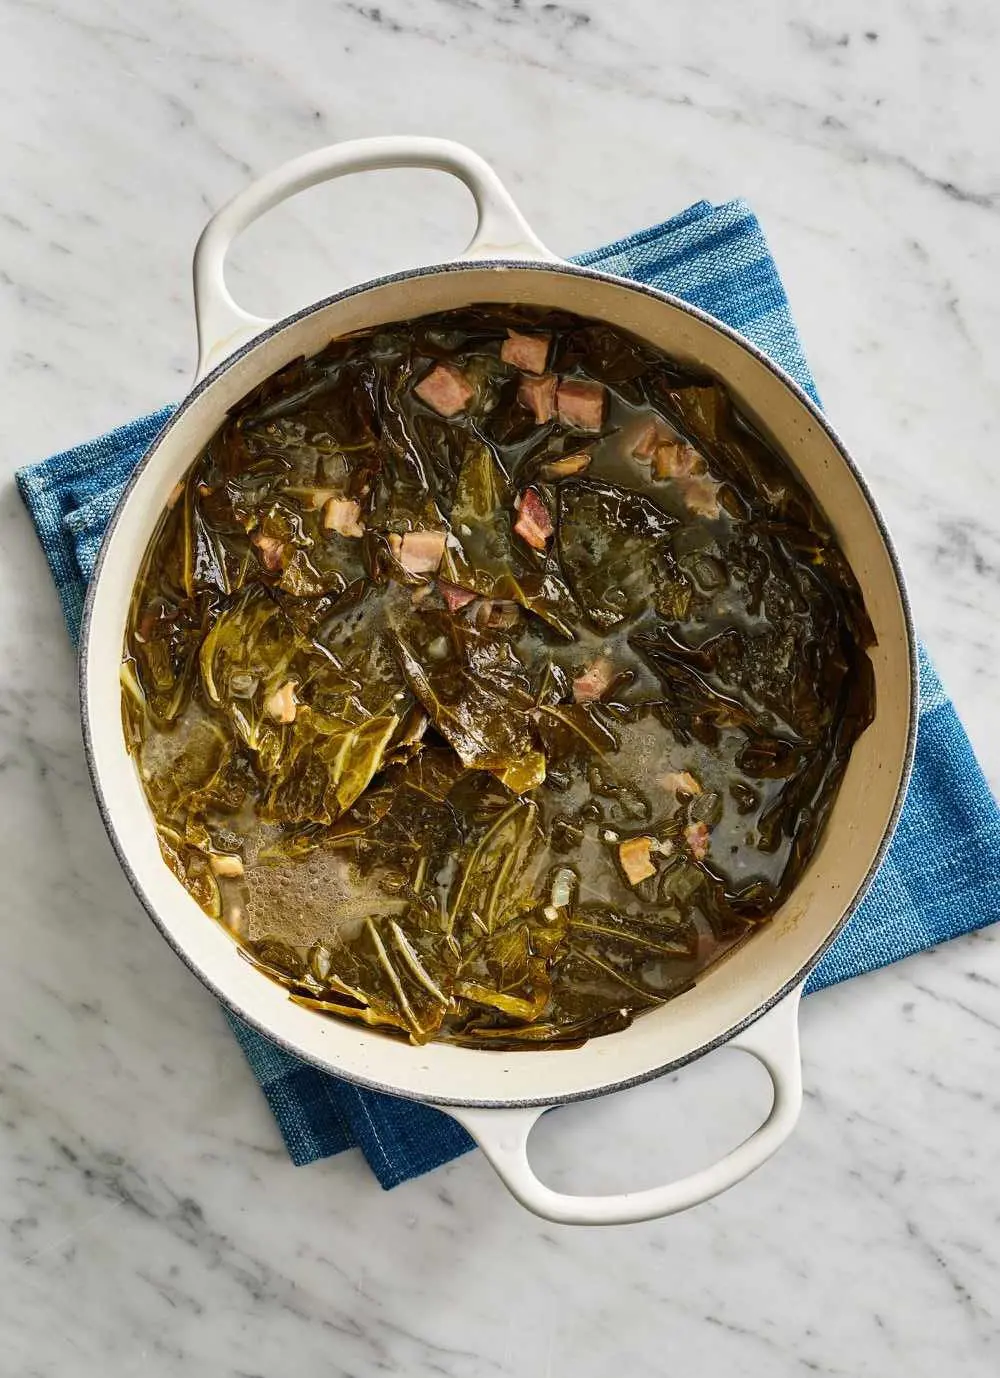
How To Cook Southern-Style Collard Greens
Cooking Southern-style collard greens is a beloved tradition of Southern cuisine, known for its comforting, rich, and savory flavors. These greens are slowly simmered until tender, resulting in a hearty and flavorful dish. Often prepared with smoked ...
Recipe
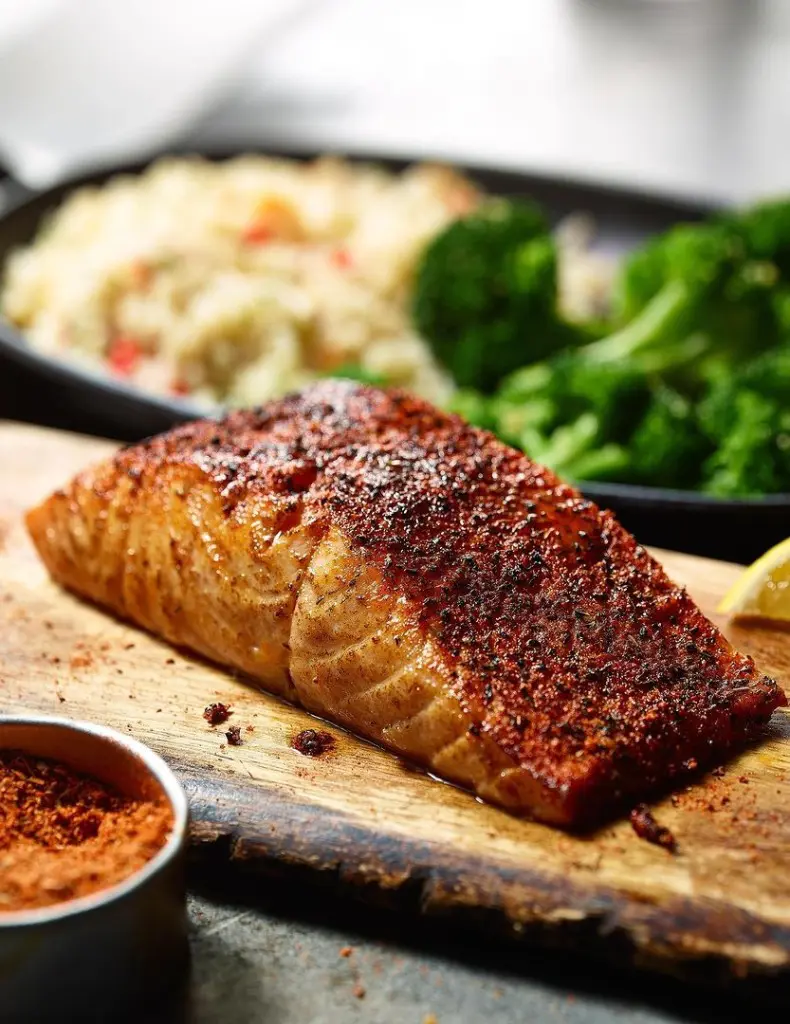
Best Herbs and Spices For Seasoning Salmon
Salmon is the culinary chameleon of the seafood world. It goes with everything, from light summer salads to comforting pasta dishes. Need a fast salmon fillet sizzling and without complicated recipes? The secret lies in perfect seasoning. With the ri...
Recipe
Garlic Butter Salmon Recipe
Garlic butter salmon is not only a culinary delight but also a nutritional powerhouse, offering a delectable blend of flavors and numerous health benefits. This dish combines the rich taste of salmon with the aromatic and savory notes of garlic ...

Recipe
A Comprehensive Guide To Perfect Salmon Gravlax
Salmon gravlax is a luxurious, flavorful dish that captures the essence of Scandinavian culinary tradition. This delicacy, made by curing salmon with a mixture of salt, sugar, and dill, is surprisingly easy to prepare at home. In this comprehensive g...
Recipe
14 Grilled Salmon Recipes For Perfect Summer Dinner
Salmon is possibly the most reliable dinner option for many households throughout America. So, we are confident that you already have an array of salmon-baked recipes on your corner. What we have brought for you today are grilled salmon recipes so yo...

Recipe
Best Smoked Salmon Appetizer Recipe
Smoked salmon appetizers are a timeless and elegant choice for any gathering. These offer a perfect balance of rich, smoky flavors and fresh, vibrant ingredients. These have become synonymous with casual brunches as well as upscale gatherings because...